
Use this checklist to set up your GGMS CRM in the right order, so your team, leads, and follow-up are ready to go.
What you’ll need
- A GGMS CRM login with the Owner role. Only Owners can invite team members, set up lead routing, and open your website settings.
- The email address of each person you want to invite
- A CSV file of the contacts you want to bring in
- About 1 to 2 hours, spread over a few days while your team accepts their invites
Your setup checklist
Work through these steps in order. Each step links to a full article with instructions.
- Learn your way around the CRM
Get to know the sidebar, your settings, and where everything lives. See Navigate the CRM. - Fill out your agent profile
Add your photo, details, bio, and social links. Follow Set up your profile, and then finish these 2 parts of your profile:- Connect your email: Connect Gmail or Outlook so you can send and receive email in GGMS. See Connect your Gmail or Outlook email.
- Connect your device: Verify your cell phone so calls, text alerts, and the dialer reach you. See Connect your device.
- Set up your notifications
Choose how you want to hear about new leads and activity, such as email, text, in-app, or browser alerts. Text alerts need the verified cell phone from step 2. See Set up notifications. - Invite your team members
Send an invite to each agent, admin, and staff member who needs access. See Invite team members to your CRM.
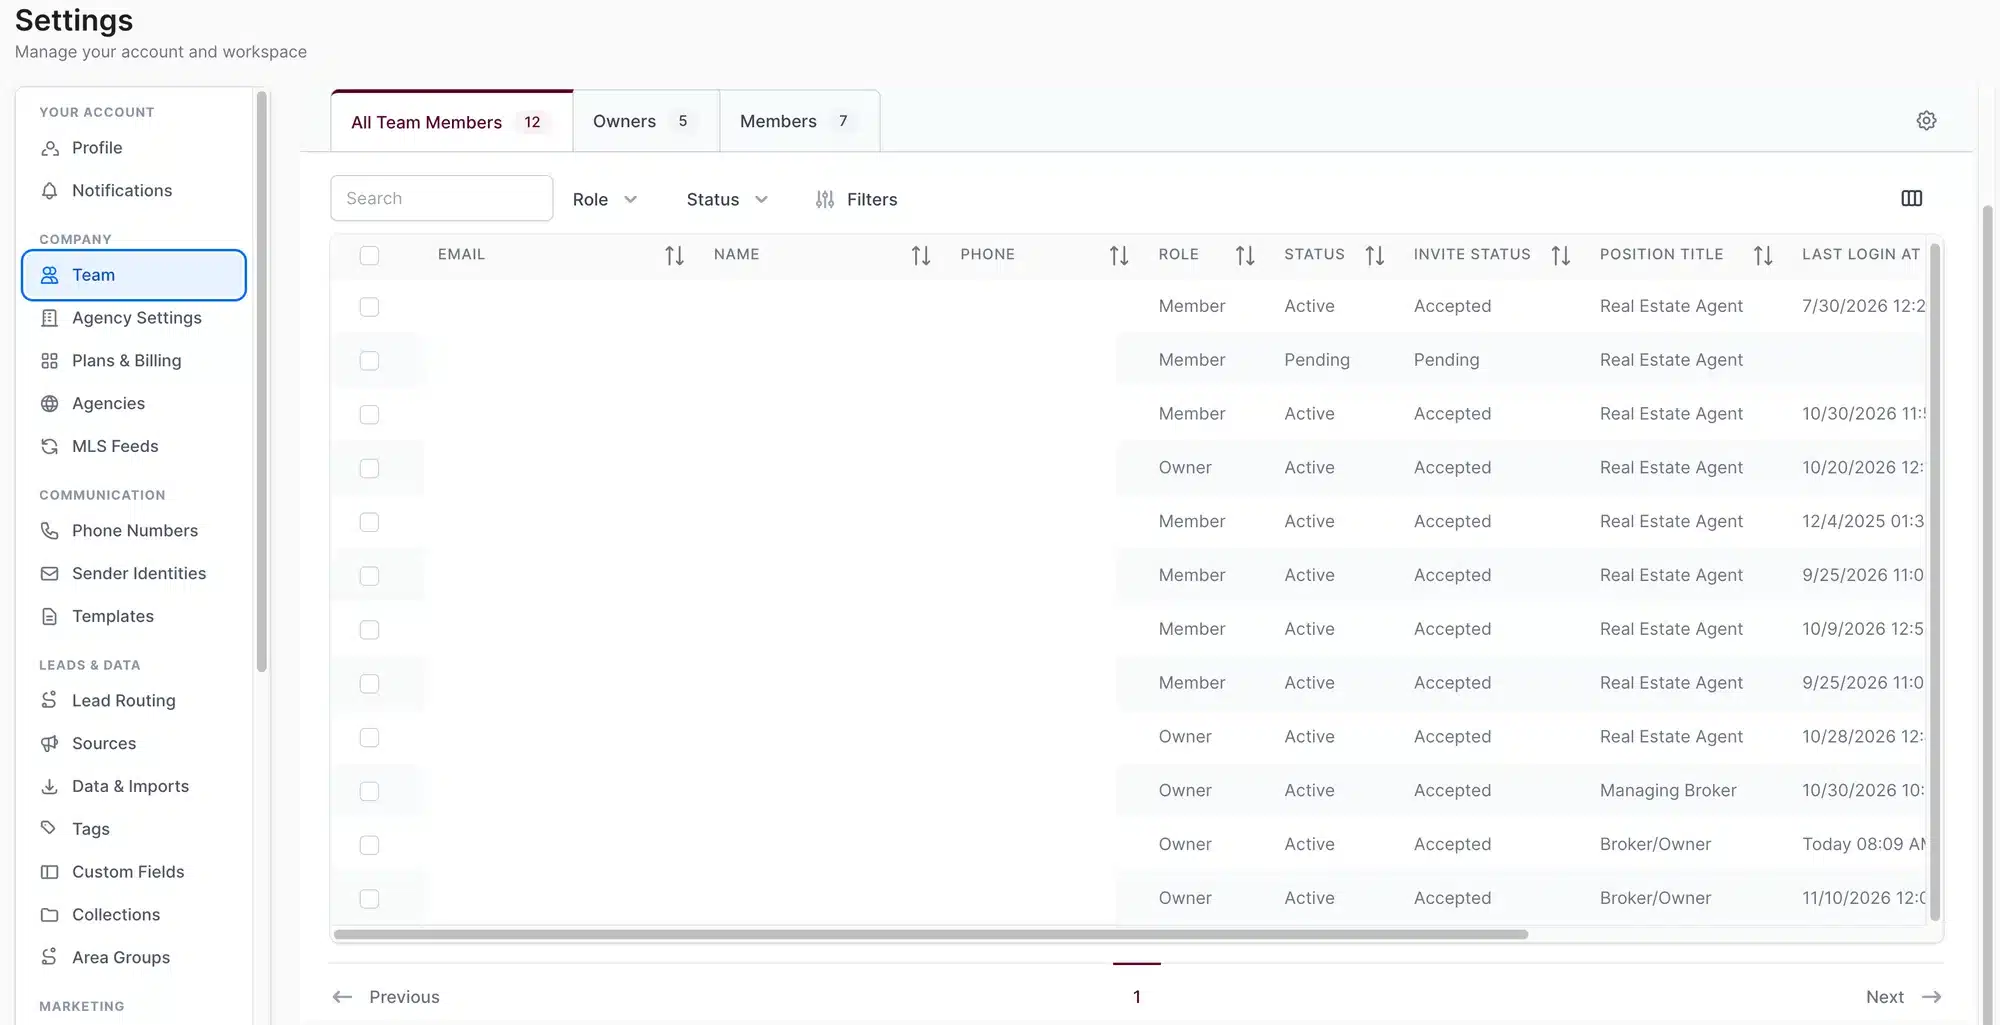
Wait until everyone shows Accepted before you import contacts or set up lead routing.
Important
Don’t import contacts or set up lead routing until your invites are accepted. Check the Invite Status column under Settings > Team. Every agent with leads in your import, and every agent in your lead routing, must show Accepted.
- Import your contacts
Bring in your contacts from a spreadsheet or your old platform with a CSV file. In Assign owner, choose the agent who gets the leads. If the agent hasn’t accepted their invite yet, or you leave the leads unassigned, they come in with no owner. See Import leads into your CRM. - Set up lead routing
Create distribution groups and routing rules, so new leads go to the right agent. Wait until every agent who’ll get leads has accepted their invite. See Set up lead routing. - Create, update, or delete automations
Build workflows that send messages, create tasks, and update contacts for you. See Create an automation workflow, Edit or pause an automation workflow, and Delete an automation workflow. Before you build, set up the pieces your workflows use:- Sources: Add the sources your leads come from, so you can use them in your workflows and lead routing rules. See Create, edit, and disable lead sources.
- Tags: Workflows can start when a tag is added. See Create, edit, and delete tags.
- Templates: Save your email templates before you build, so you can pick them in a Send email step. See Create, edit, and delete templates.
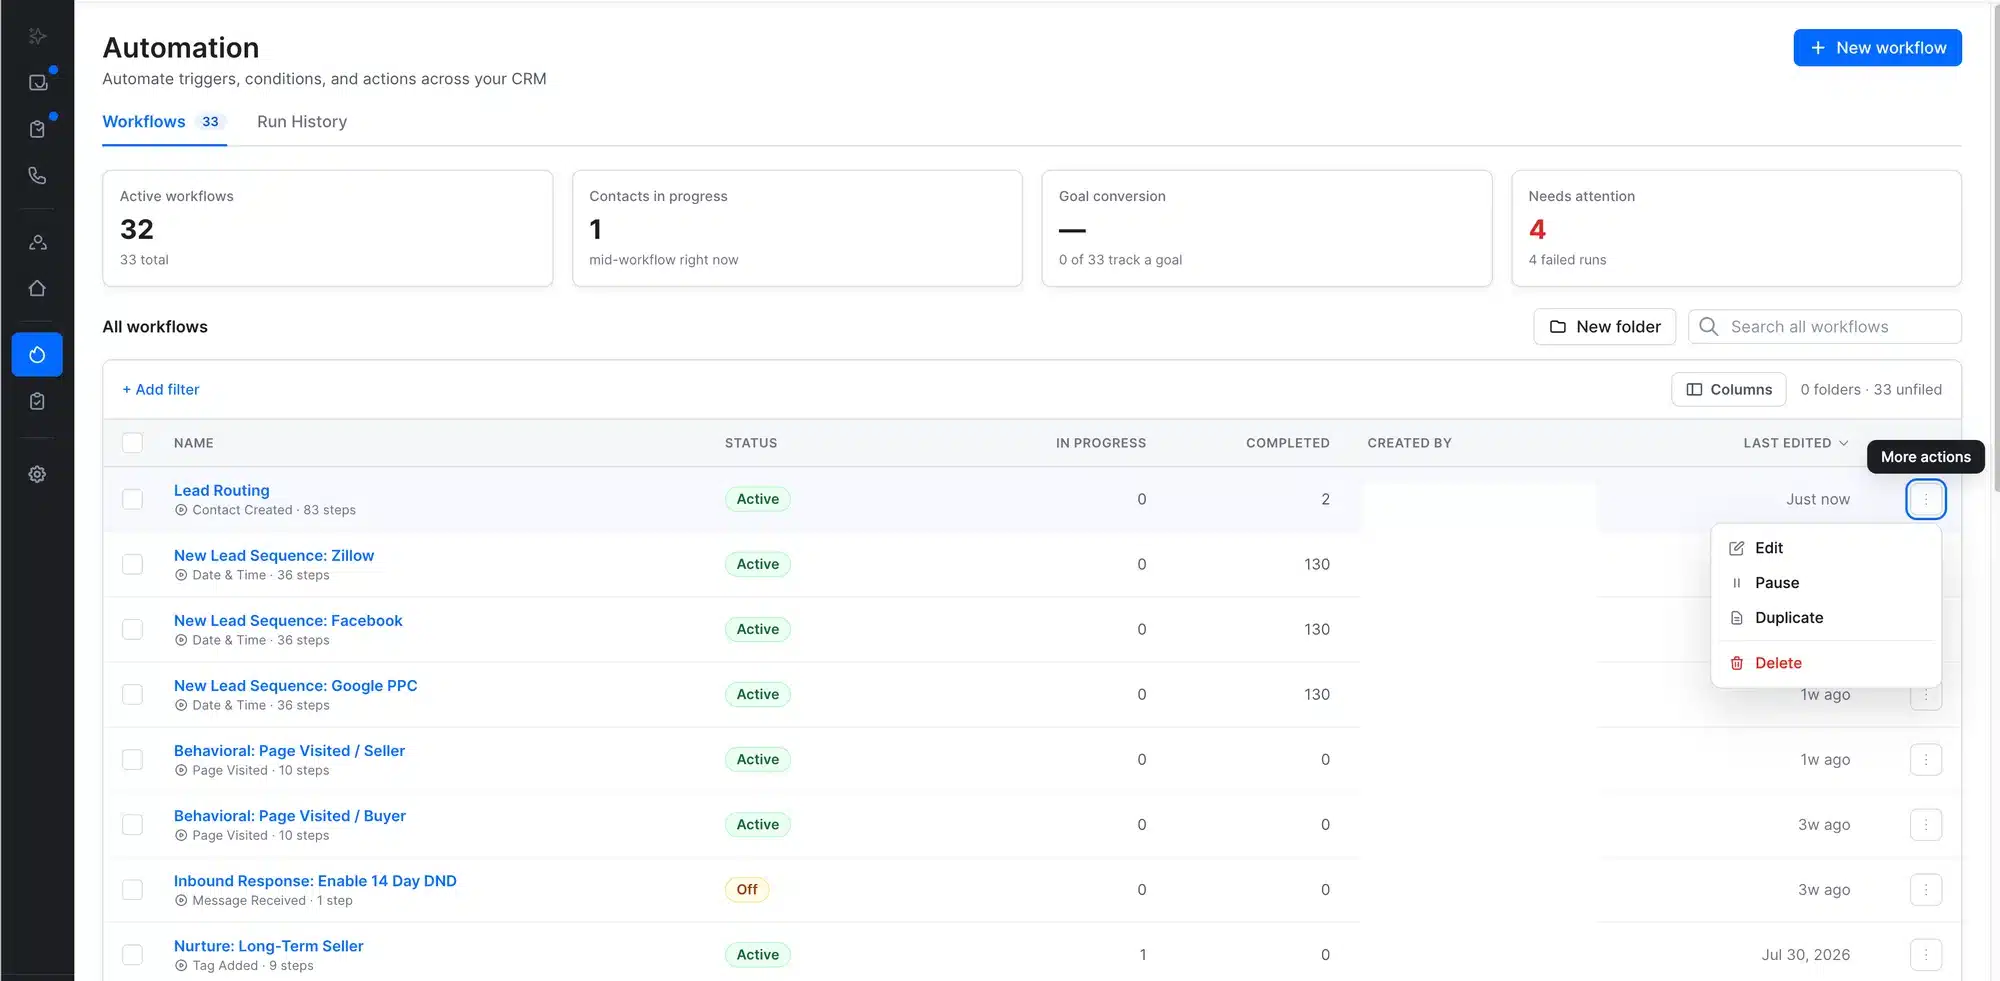
Use the More actions menu on any workflow to edit, pause, duplicate, or delete it. - Access your website
Open your live site, or go into its admin area to make edits. See Access your website and create subdomains.
Good to know
New pages and posts on your website are saved as drafts by default. They don’t publish on their own unless you turn on autopilot.
What happens next
Once you finish the checklist, your team can log in, work their leads, and follow up from one place. Ask each team member to complete steps 2 and 3 in their own account, so their email, phone, and alerts work too.