
Build a workflow that sends messages, creates tasks, and updates contacts for you when something happens in your CRM.
What you’ll need
- A login to your GGMS CRM. Every user in the CRM can open Automation.
- An idea of what should start the workflow, such as a form submission or a new tag
- The emails or texts you want to send, if your workflow sends messages. To use an email template, create and save it before you build the workflow. You can also write a custom email inside the workflow instead.
- About 15 to 30 minutes
Step by step
- Open Automation
In the left menu, click Automation. You’ll see all your workflows, plus counts for Active workflows, Contacts in progress, Goal conversion, and Needs attention.
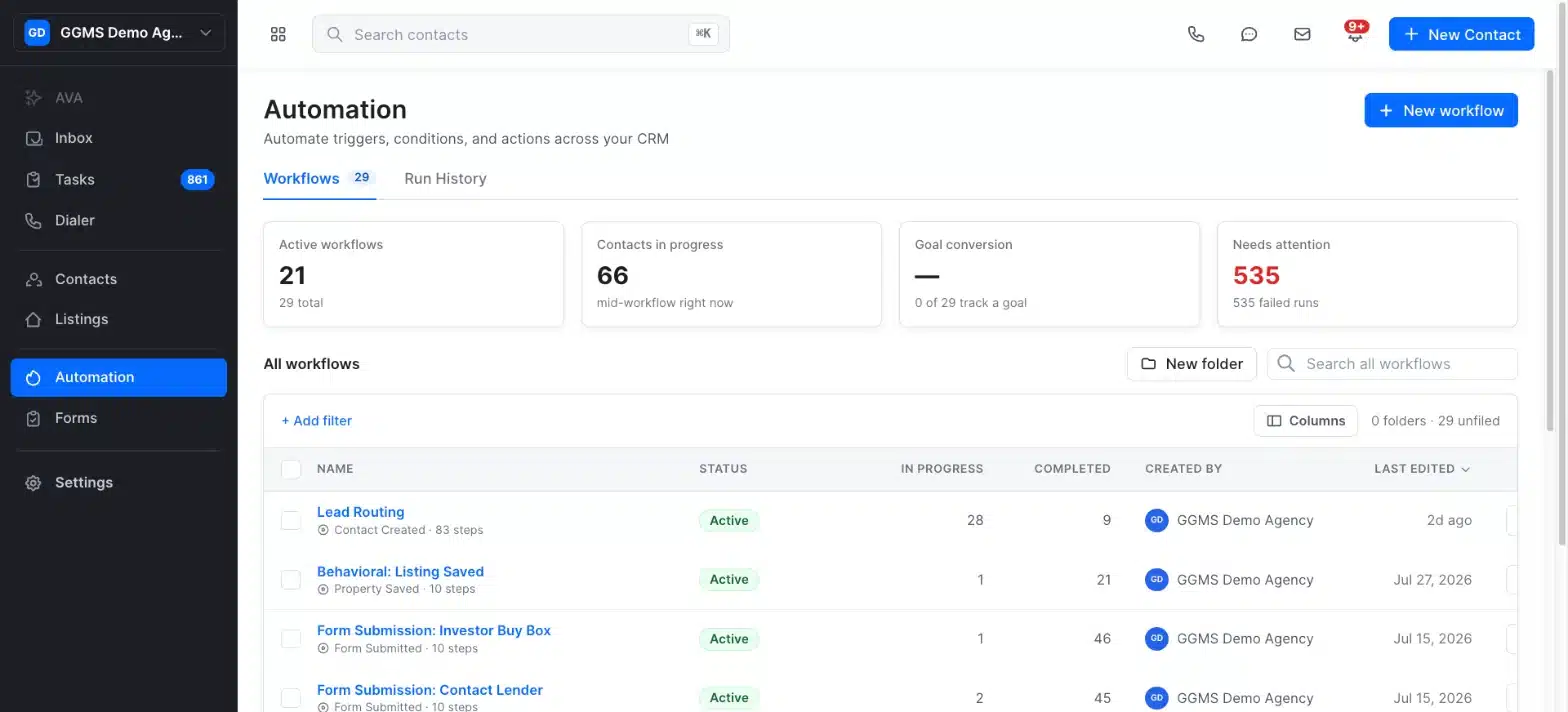
The Automation page lists every workflow with its status and how many contacts are in progress. - Start a new workflow
Click New workflow. Choose Start from scratch, or pick a ready-made play such as New Lead Nurture, Seller Valuation Follow-up, or Speed-to-Lead Routing.
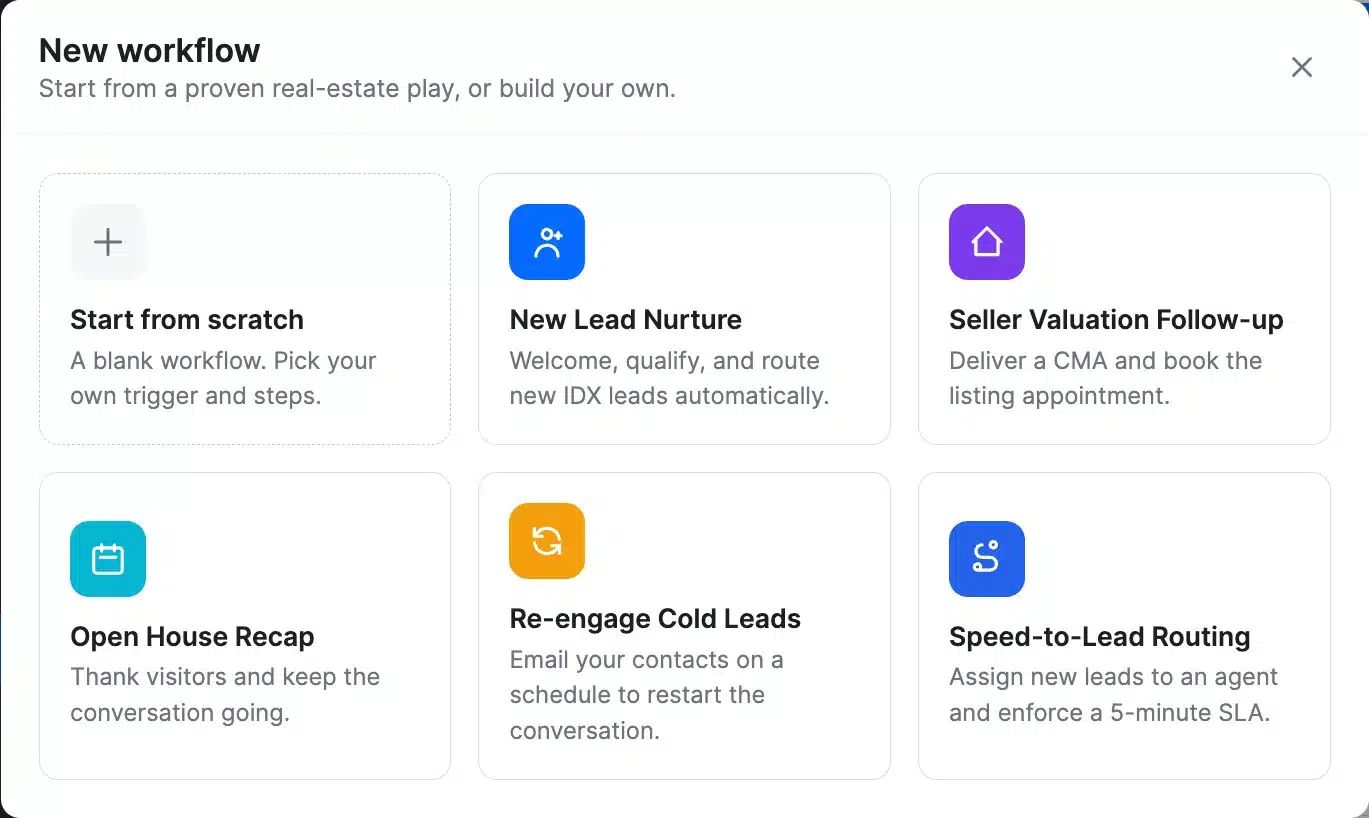
Start from a template to save time, or build your own from scratch. - Choose a trigger
Click the trigger card at the top of the builder, then click Add a trigger. Pick what puts a contact into the workflow, such as Form Submitted, Tag Added, or Manual Enrollment, and click Save trigger.
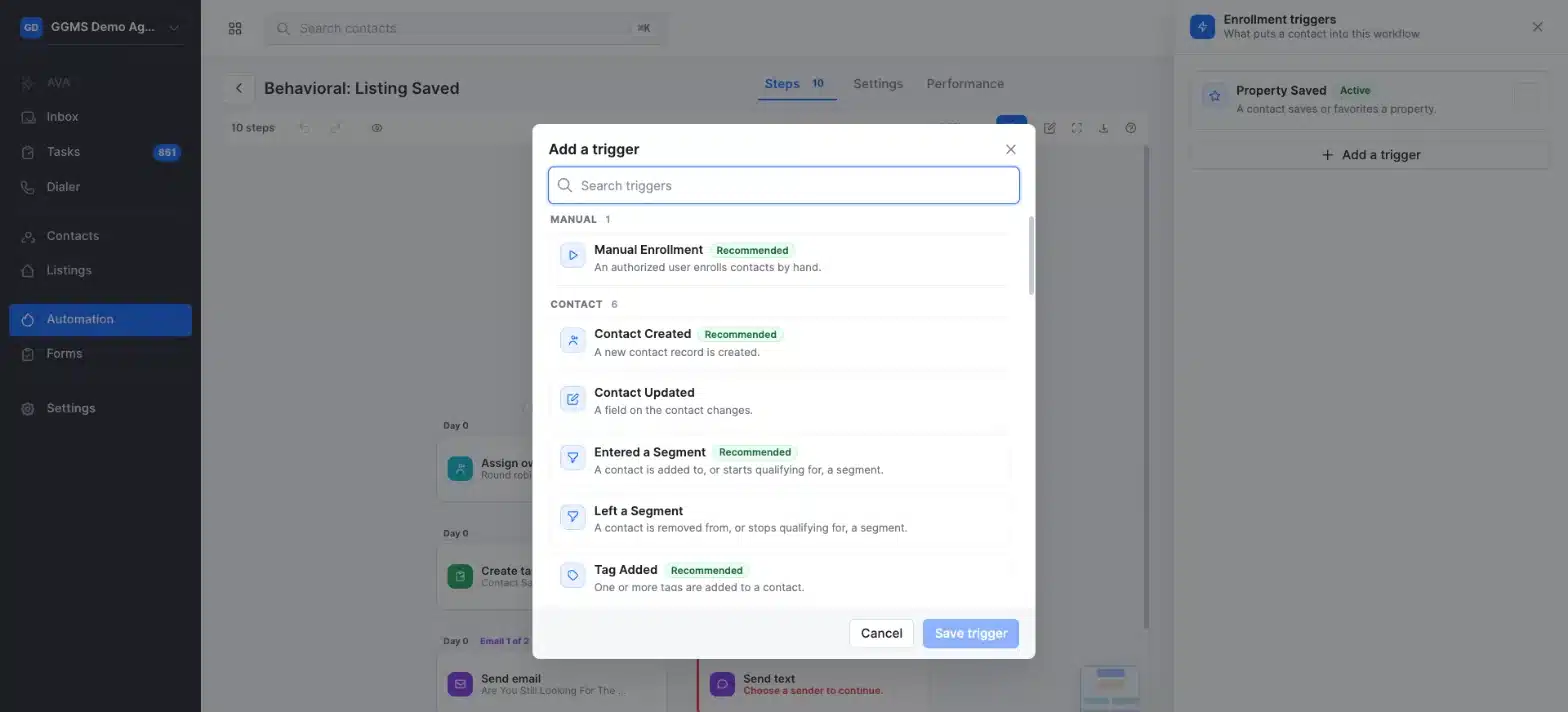
Triggers are grouped by type. Use the search box to find one fast. - Add your steps
Click the + below a step to open Add a step, then choose an action. You can send an email or text, add a Delay, split contacts with an If / then branch, assign an owner, or create a task.
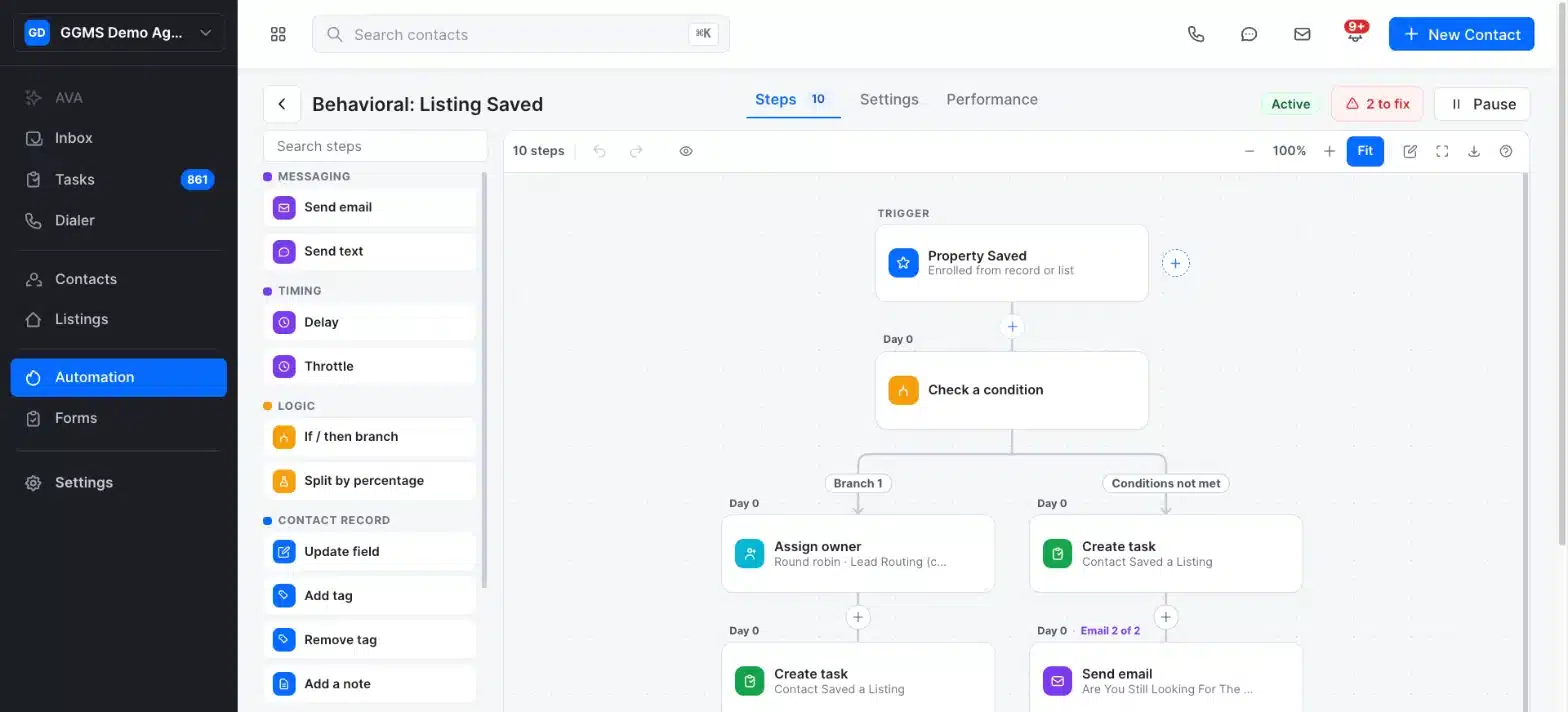
Steps run from top to bottom. Branches send contacts down different paths. - Fill in each step
Click a step to open its details and finish setting it up. For a Send email step, choose a saved email template or write a custom email. - Review the workflow settings
Click the Settings tab. Add a Description, choose a Workflow owner, and decide who can enter, whether contacts can re-enroll, and when a contact’s run ends.
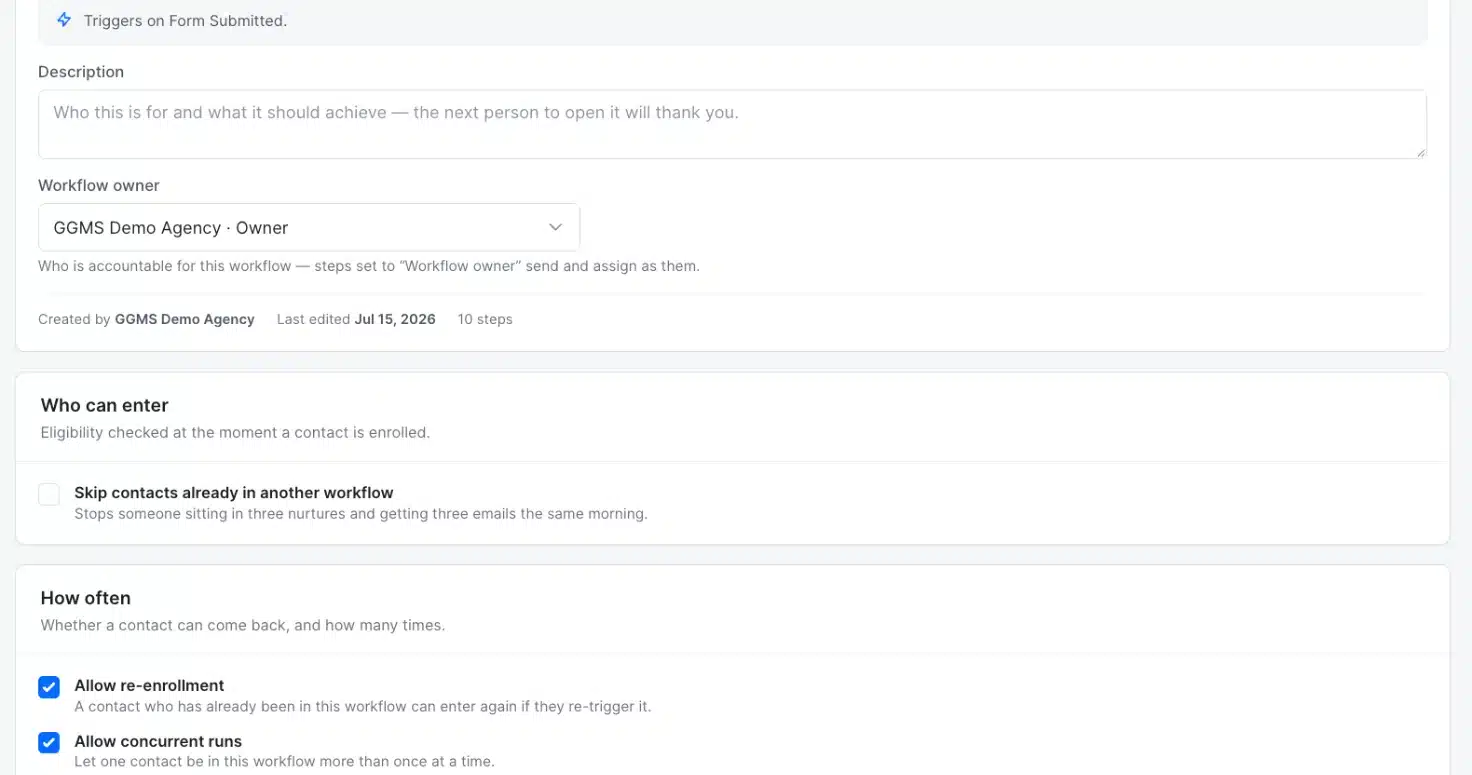
Settings control who enters the workflow and how often. - Turn the workflow on
When you’re ready, click Activate. To stop a running workflow later, open it and click Pause.
Good to know
A workflow you start from scratch is saved as a Draft and doesn’t enroll anyone until you click Activate.
Tip
To test a new workflow safely, turn on Cap total enrollments in Settings, or use the Manual Enrollment trigger and add a few contacts yourself.
What happens next
Once the workflow is active, each contact who meets the trigger moves through your steps on schedule. Open the workflow and click the Performance tab to see how it’s doing. On the Automation page, the Run History tab shows each run, and the Needs attention card counts runs that failed.
Important
Before you send automated emails or texts, check with your broker about consent and marketing rules in your area.
Troubleshooting
Your email template isn’t in the list
Email templates must be created and saved before you can add them to a workflow. Save the template, then open the Send email step again. If you’d rather not save a template, write a custom email in the step instead.
A step shows red text
Red text, such as “Choose a sender to continue,” means the step still needs information before it can run. Click the step and fill in what’s missing.
A contact is getting messages from more than one workflow
Open each workflow, click Settings, and turn on Skip contacts already in another workflow. This stops someone from getting several emails on the same morning.
A contact keeps re-entering the workflow
In Settings, under How often, turn off Allow re-enrollment. You can also turn on Limit how often a contact can enter and set a maximum.
Follow-up keeps going after a contact replies
In Settings, under When it ends, turn on They reply on any channel. A reply by text or email then ends that contact’s run.