
Bring leads into your GGMS CRM from a spreadsheet or your old platform with a CSV file, and set their source, owner, type, and tags as you go.
What you’ll need
- A login to your GGMS CRM
- A .csv file of your leads, with column headers in the first row
- An email address or phone number for every lead
- About 10 minutes
Tip
Not sure how to set up your file? In the import window, click Download our CSV template. It has the exact columns the CRM recognizes, so they match automatically.
Step by step
- Open the import window
In the sidebar, click Contacts, and then click Import next to New Contact. The Import contacts window opens with four steps across the top: Upload, Map, Process, and Results.
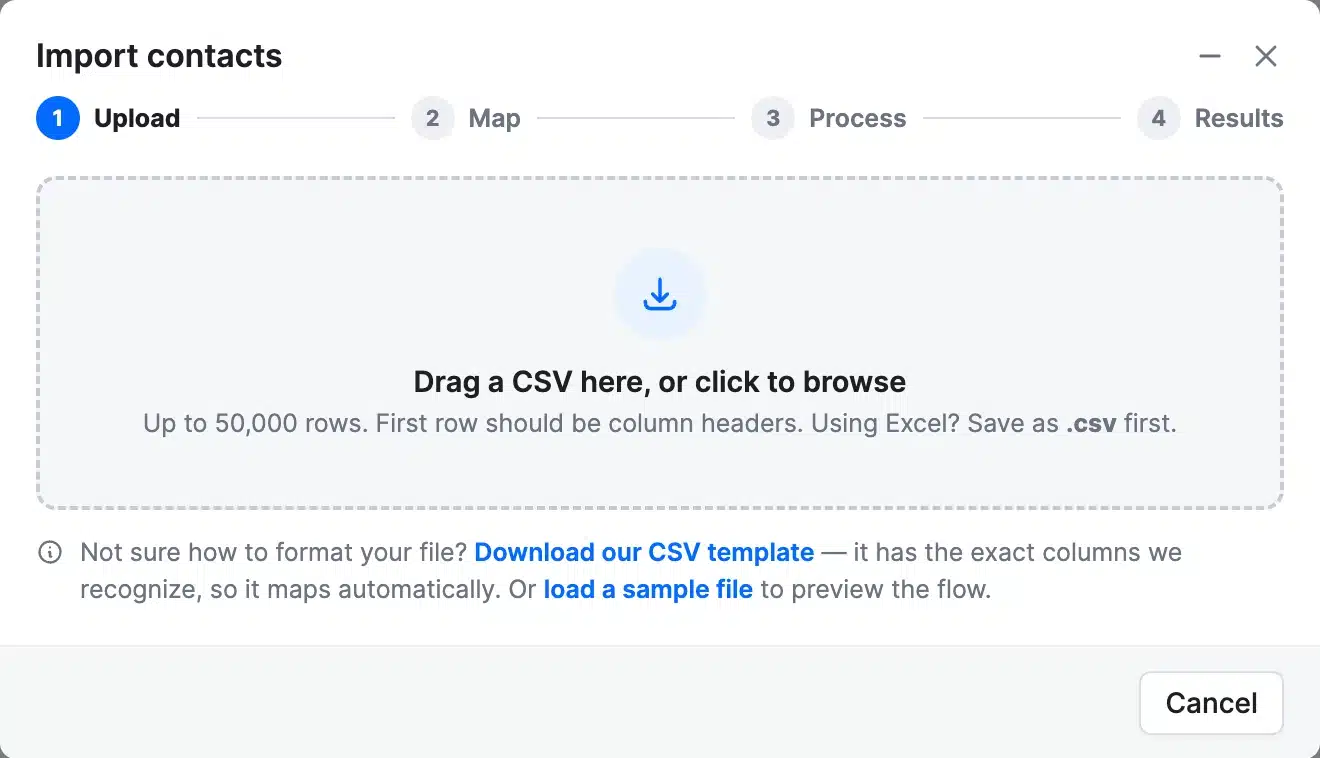
Drag in your CSV file, or click the box to browse for it. - Upload your file
Drag your .csv file into the box, or click the box to browse for it. You can import up to 50,000 rows at a time. If you’re working in Excel, save the file as .csv first. - Set details for the whole import
At the top of the Map step, choose anything that applies to every lead in the file:- Lead source: where these leads came from. It’s added to every contact in the import.
- Assign owner: the agent who gets these leads. Leave it as Leave unassigned to let your lead routing rules assign them.
- Lead type: Agent, Client, Lead, Sphere, or Vendor.
- Add tags: tags to add to every lead, so you can find this group later.
- Match your columns
Each column from your file is listed on the left, with the GGMS field it goes into on the right. The CRM matches the columns it recognizes for you and tells you how many it matched. For any other column, click the list on the right and choose a field. You can search the list, choose Custom field to keep data that doesn’t fit a standard field, or choose Skip column to leave it out.
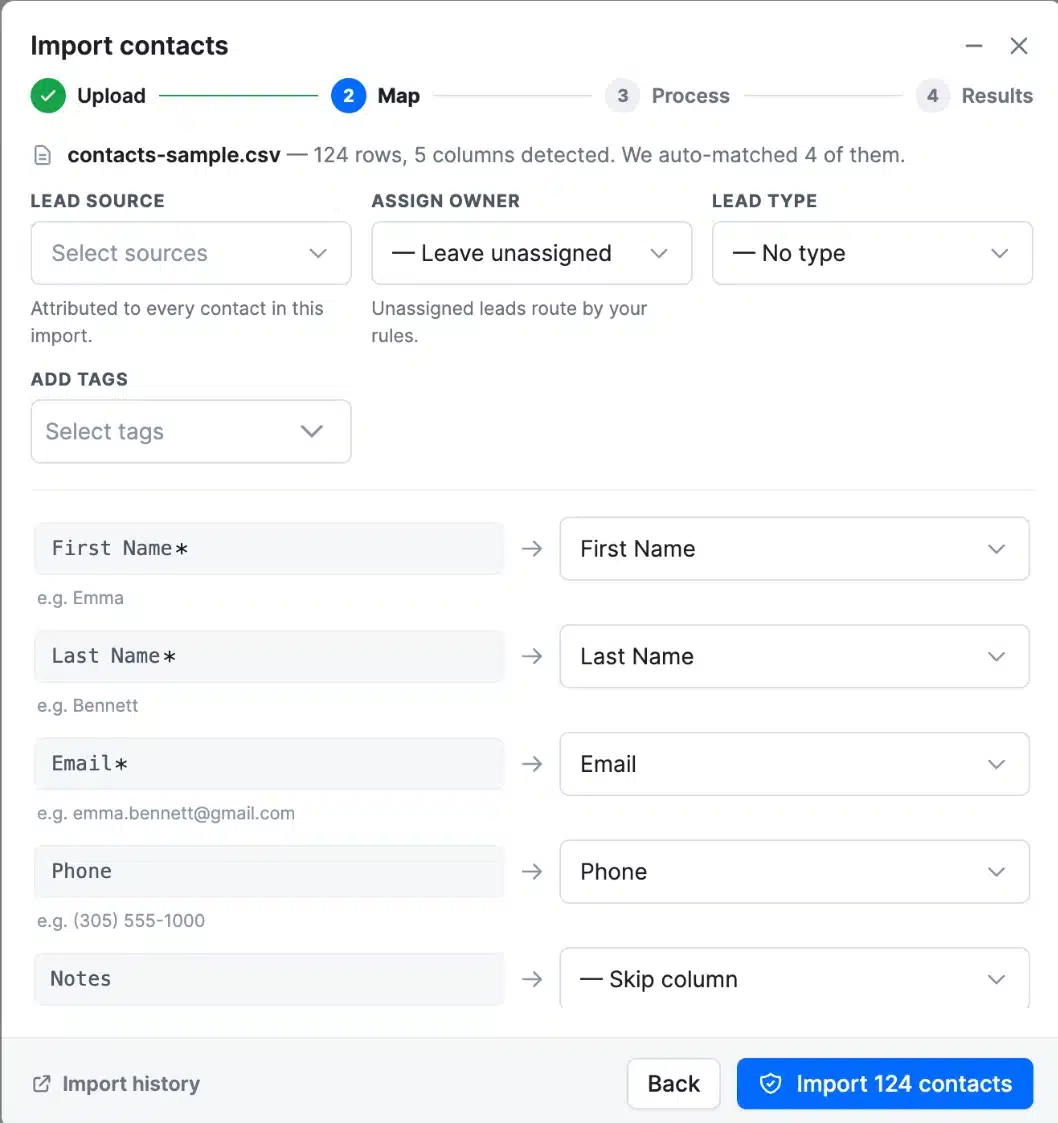
Set details for the whole import at the top, then check how each column is matched. - Start the import
Click Import. The button shows how many contacts are in your file, like Import 124 contacts. On the Process step, a progress bar shows how many rows are done. Large files can take a few minutes. - Check the results
When the import finishes, the Results step shows how many rows were Created, Updated, Skipped, or had Errors. Any rows that couldn’t be imported are listed with the reason, like Invalid email address or Missing email or phone. To fix them, click Download error report, correct those rows, and then click Re-upload corrected file. When you’re finished, click Done.
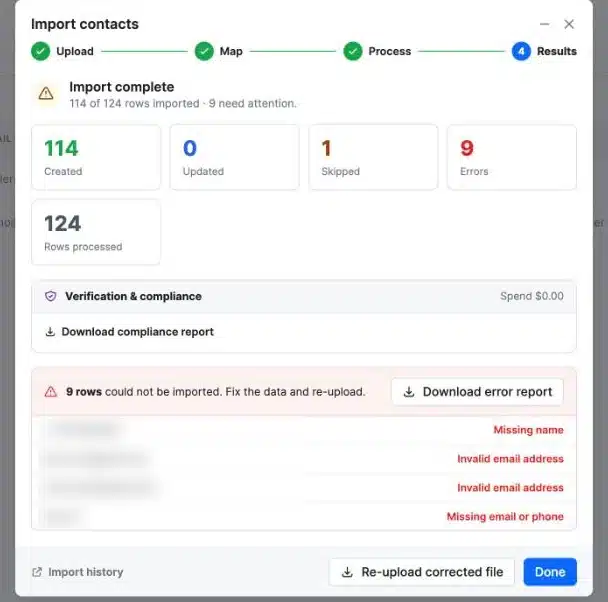
The results show what was created and which rows need fixing.
Important
Every lead needs an email address or a phone number. Rows that have neither aren’t imported, and show Missing email or phone in the results.
What happens next
Your new leads appear in your Contacts list. Leads you left unassigned are assigned by your lead routing rules. To see past imports, click Import history at the bottom of the import window, or go to Settings > Data & Imports. Click any import to see its results, download its reports, or undo it.
Troubleshooting
Some rows didn’t import
Check the reason next to each row in the results. Common reasons are Missing email or phone, Invalid email address, and Missing name. Click Download error report to get those rows as a file, fix them, and then click Re-upload corrected file.
My file won’t upload
Make sure the file is saved as .csv, has column headers in the first row, and has 50,000 rows or fewer. If you have more, split it into smaller files and import each one.
A column didn’t match
Choose the field for it manually from the list on the right, or choose Custom field. To have columns match automatically next time, start from the CSV template.