
Use Plans & Billing to see your current plan, compare packages, add what your team needs, and keep your payment details up to date.
Important
Only users with the Owner role can open Plans & Billing. If you don’t see it in Settings, ask your account owner for help.
What you’ll need
- A GGMS CRM login with the Owner role
- A payment method, such as a credit or debit card, if you plan to buy anything
- About 10 minutes
Open Plans & Billing
- Open Settings
In the left menu of your CRM, click Settings. - Go to Plans & Billing
Under Company, click Plans & Billing. The Plans tab opens, and your plan is marked Current plan.
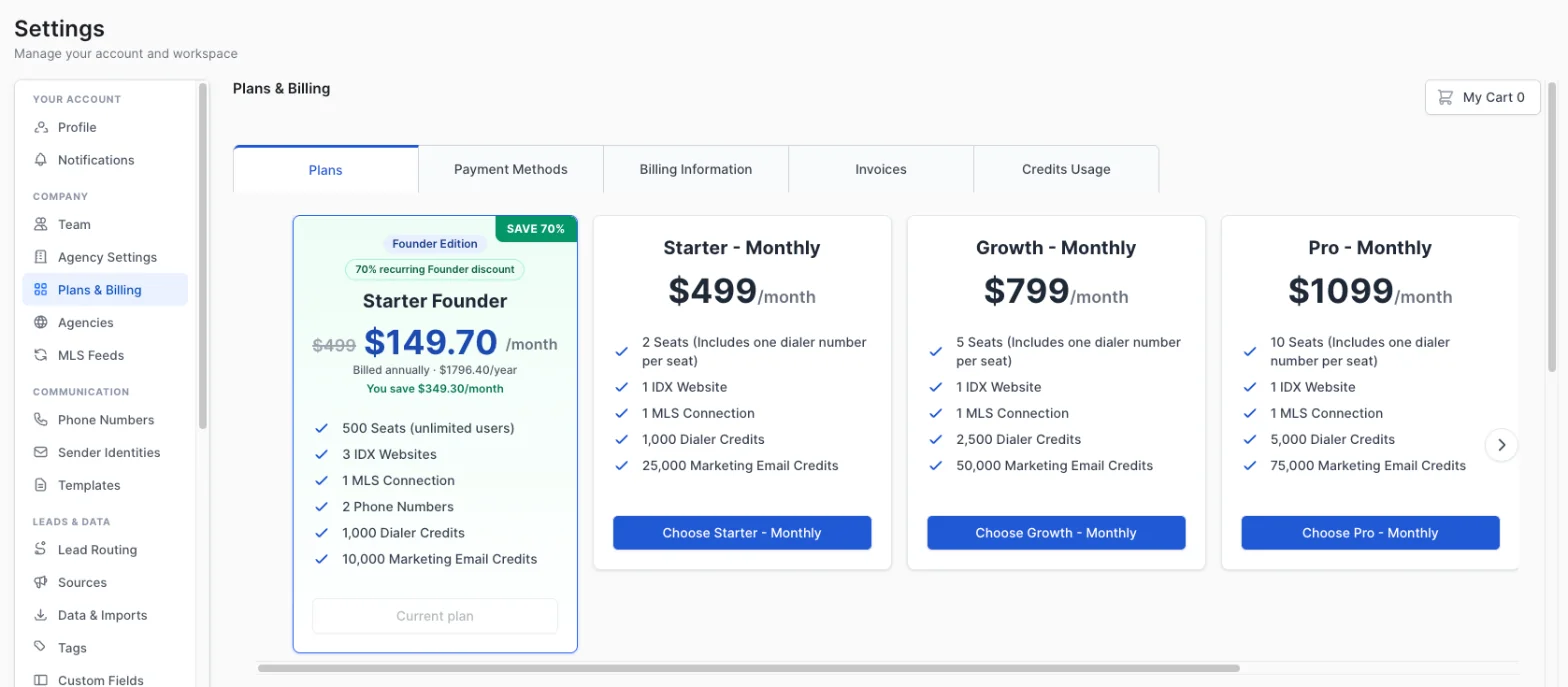
Your current plan is outlined and marked Current plan.
Compare plans and change your plan
Each package includes a different number of seats, IDX websites, MLS connections, phone numbers, dialer credits, and marketing email credits. Check what each plan includes before you switch.
- Review the plan cards
Read the list on each card to see what’s included. To see more plans, click the arrow on the right side of the cards.
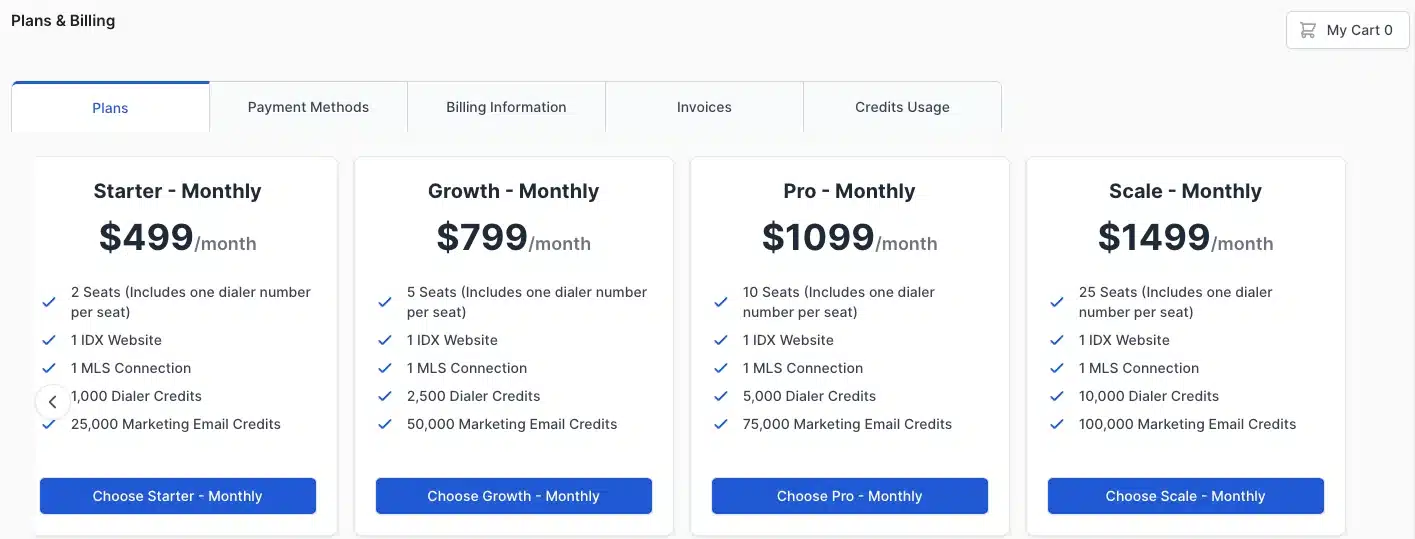
Plans differ in seats, dialer credits, and marketing email credits. - Choose a new plan
On the plan you want, click its Choose button, for example Choose Growth – Monthly. - Complete checkout
The Checkout panel opens with your new plan in the Order summary. Review the total, and then click Continue to Checkout.
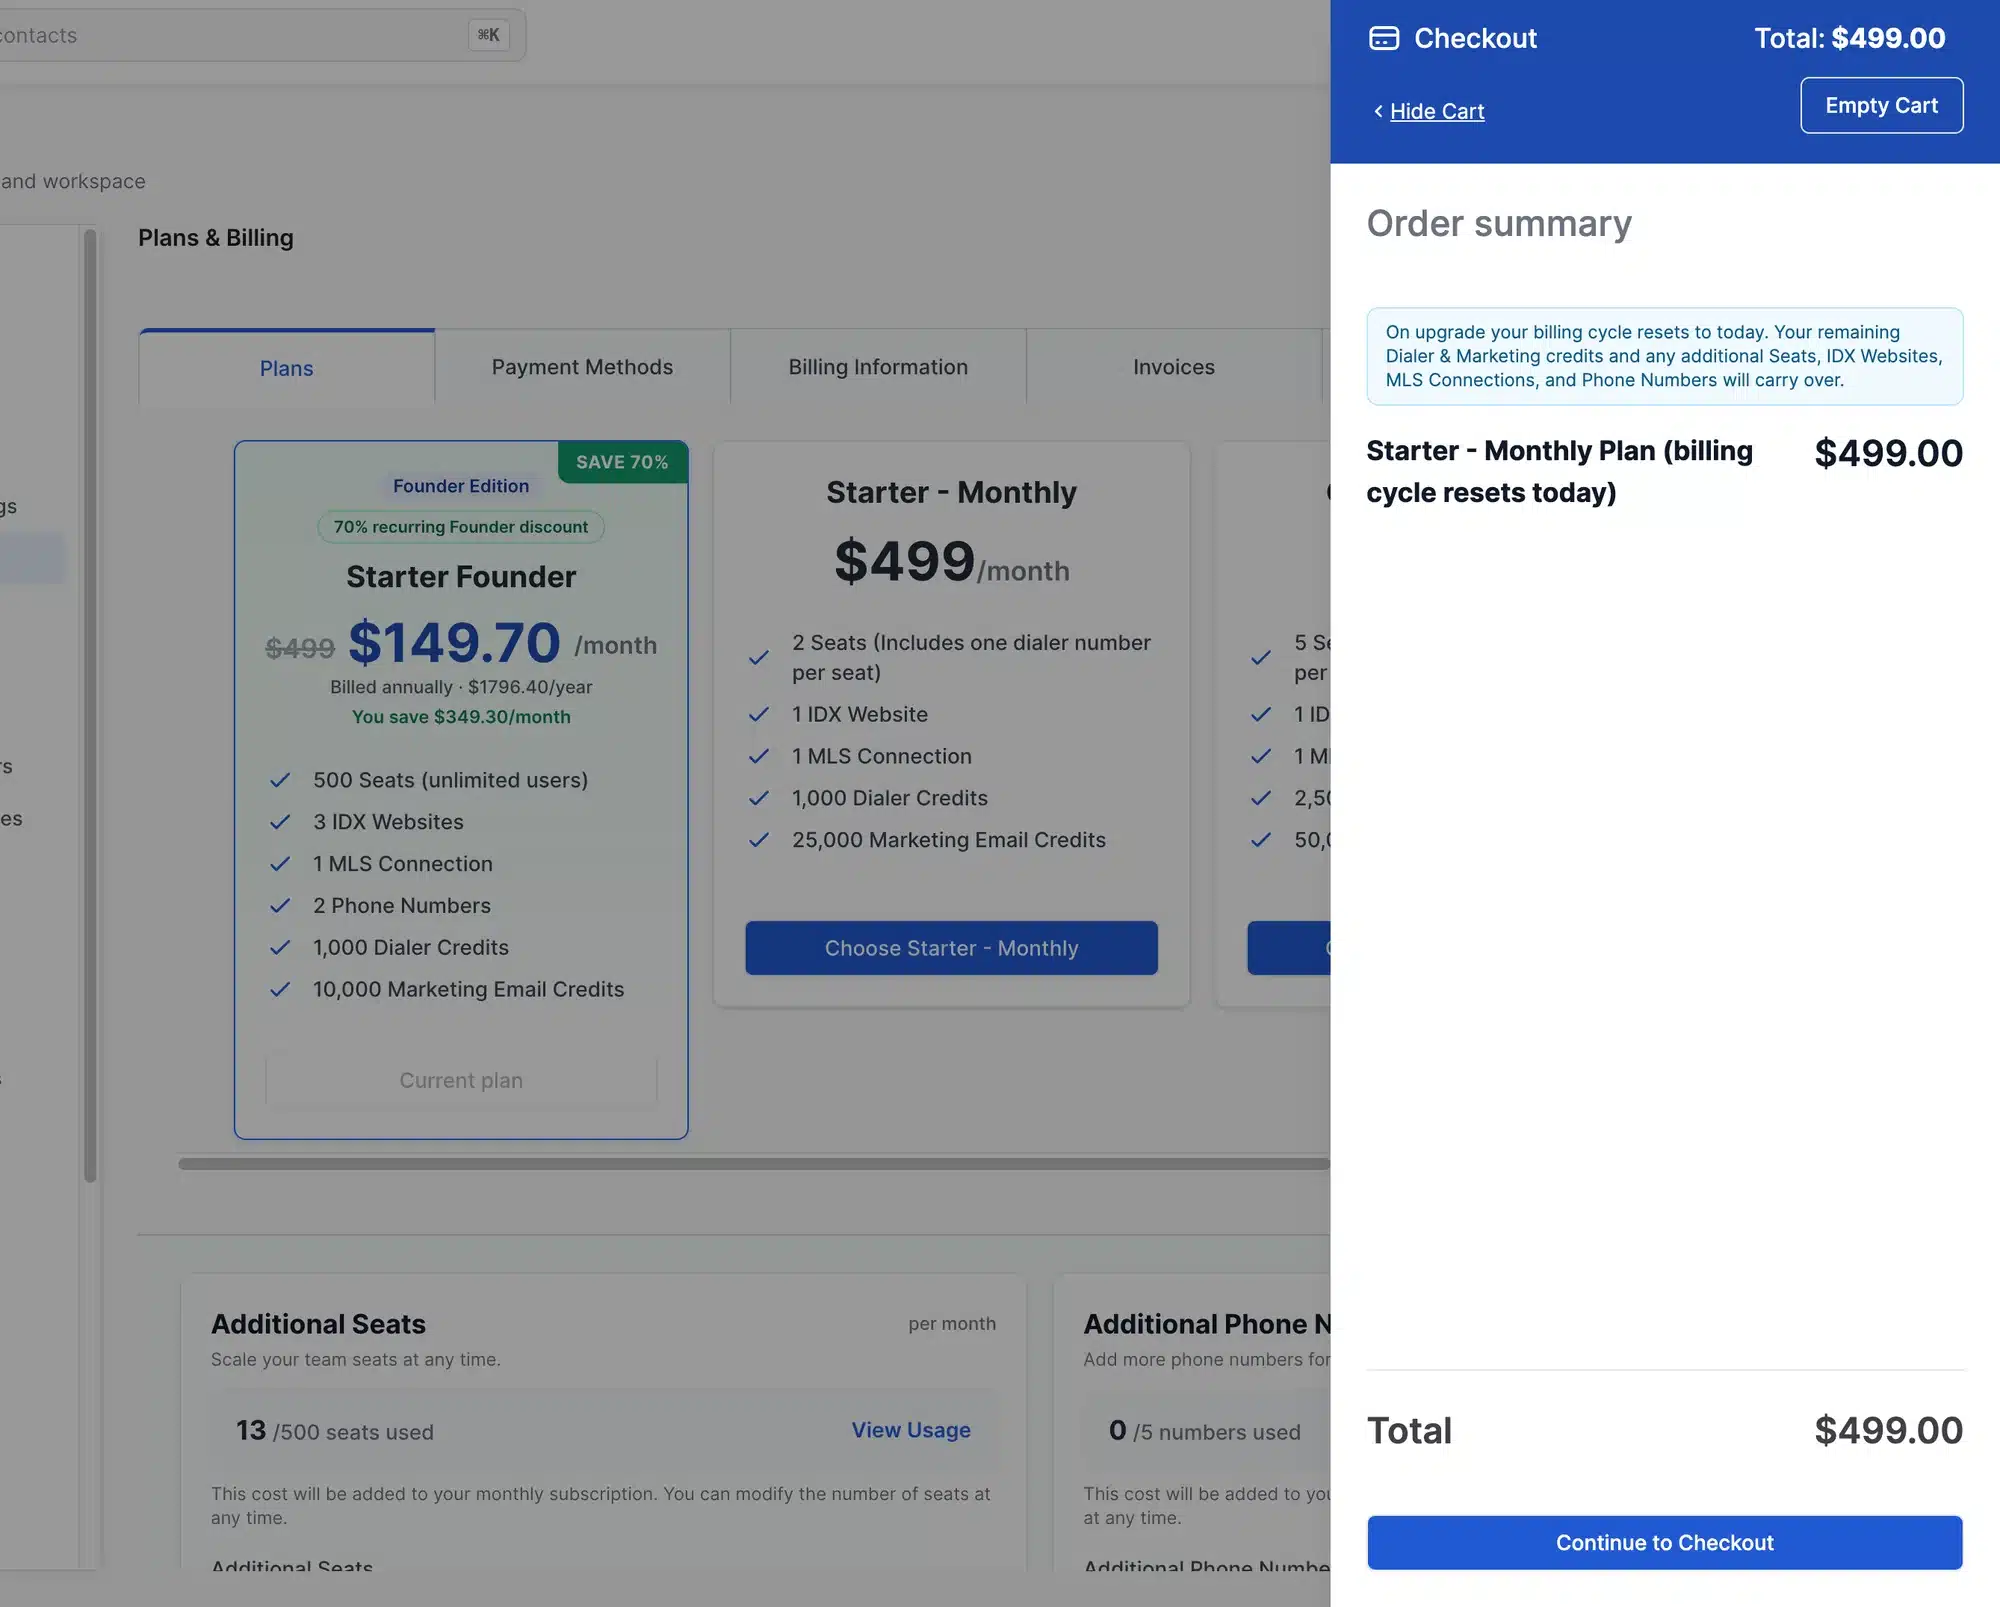
Read the note at the top of the order summary before you check out.
When you upgrade, your billing cycle resets to the day you upgrade. Your remaining dialer and marketing email credits carry over, along with any additional seats, IDX websites, MLS connections, and phone numbers.
Good to know
Monthly plans include one dialer number for each seat. Some accounts, such as Founder Edition plans, have different limits and billing terms than the standard packages.
Add seats, phone numbers, or credits
You don’t have to change plans to get more room. Scroll below the plan cards to add only what you need.
- Check your usage
Each box shows what you use against your limit, for example 13 /500 seats used. Use this to decide how many to add. - Enter how many to add
Type a number in the field, such as Additional Seats or Additional Phone Numbers. The price per unit shows under the field. - Add it to your cart
Click Add to cart. The button stays gray until you enter a number above 0. - Check out
At the top of the page, click My Cart, review the Order summary, and then click Continue to Checkout.
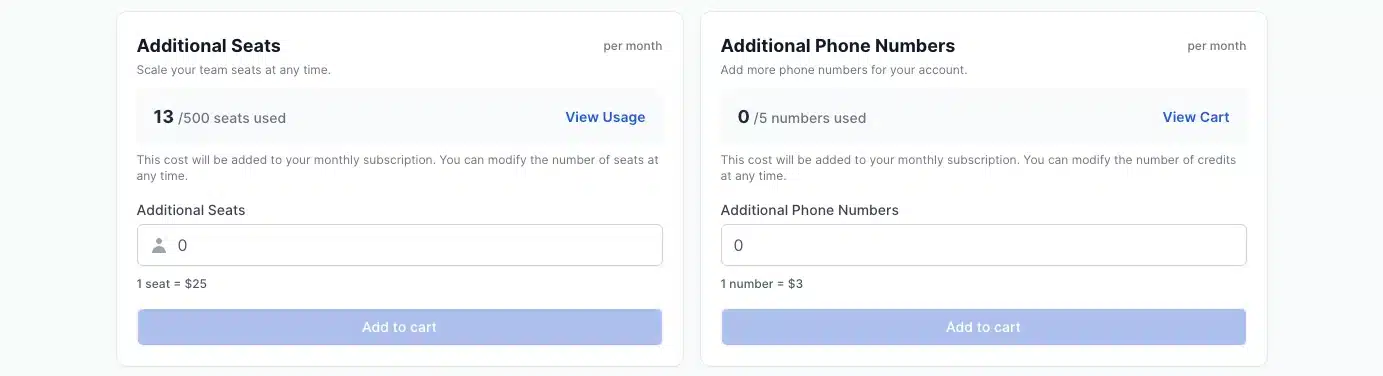
Seats and phone numbers are added to your monthly subscription.
Add-ons are billed in 2 ways:
- Monthly with your plan: Additional seats, phone numbers, IDX websites, and MLS connections. You’ll find IDX websites and MLS connections under Recurring Add-ons.
- Once at checkout: Dialer credits and marketing email credits, under One-time Credits.
Use the other billing tabs
- Payment Methods: Click Add New Payment Method to add or update the card you pay with.
- Billing Information: Enter your company name, address, phone number, and email for your invoices, and then click Save Billing Information.
- Invoices: Find past invoices. Filter by Created Date or Due Date, or search.
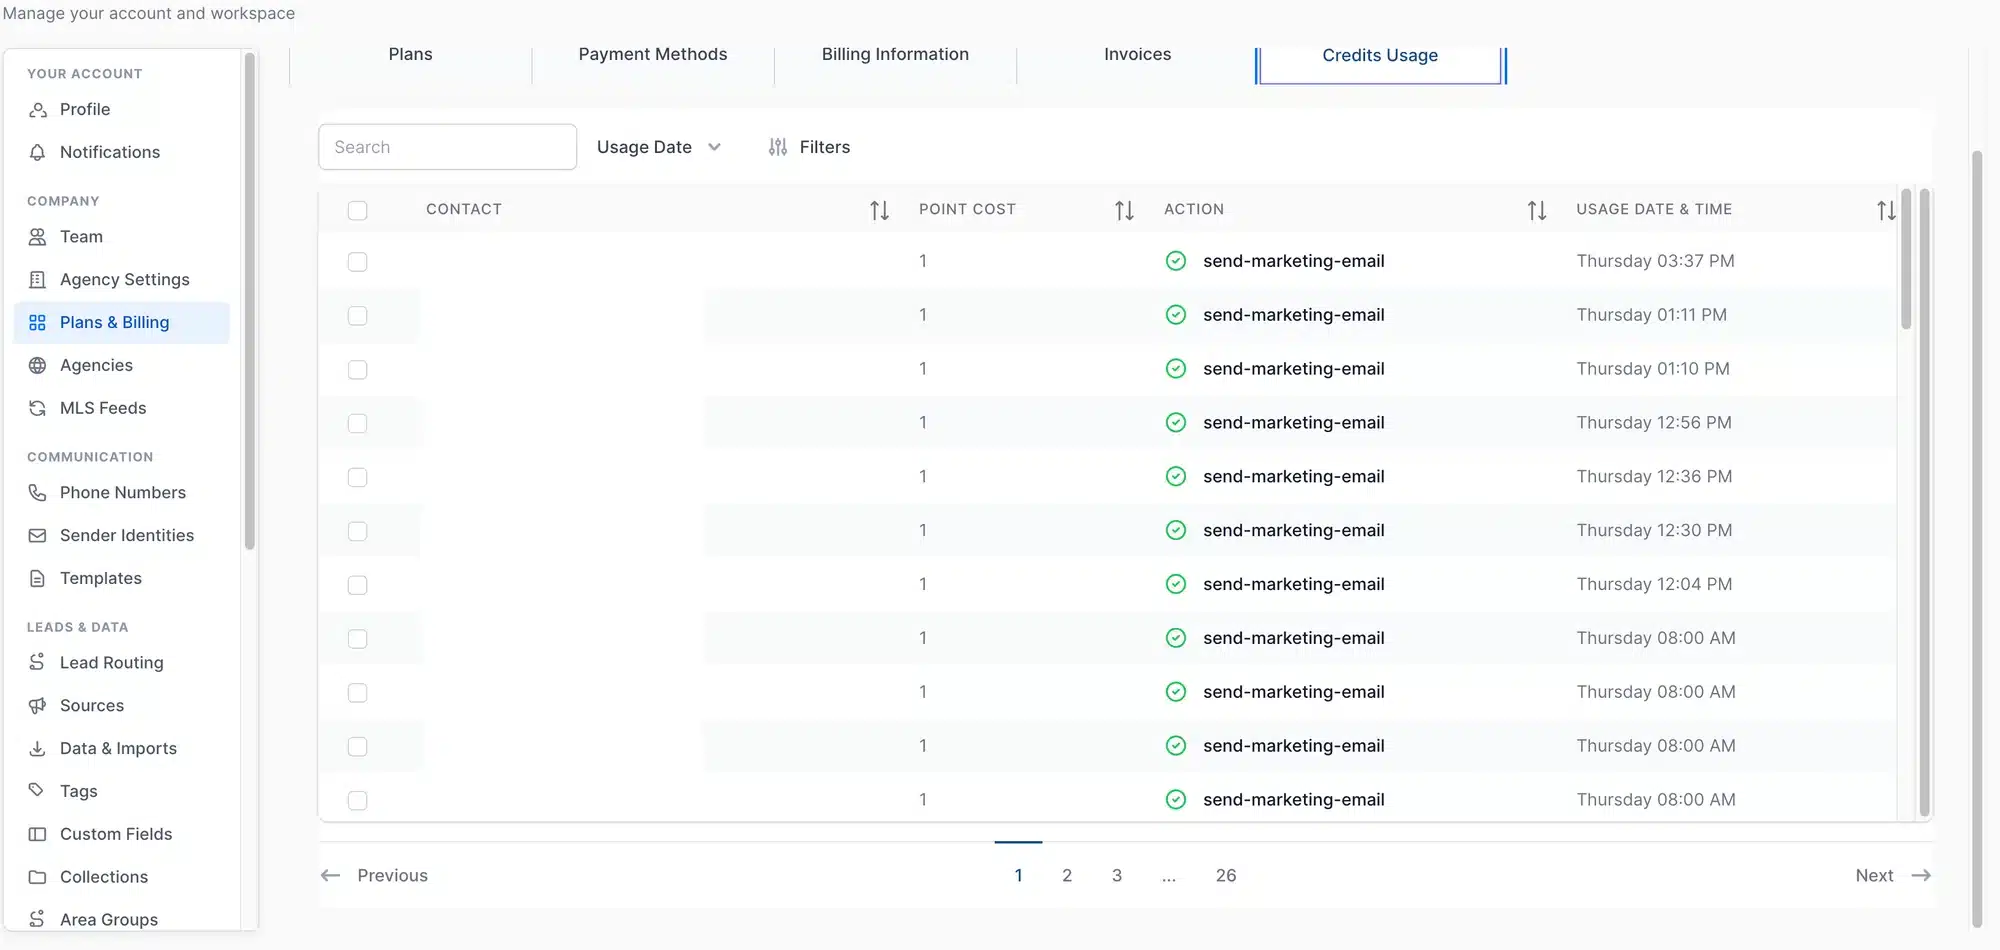
- Credits Usage: See every credit you’ve used. Each row shows the contact, the point cost, the action (for example, send-marketing-email), and the date and time. Filter by Usage Date, or search.
What to expect
After checkout, recurring add-ons are added to your monthly subscription, and one-time credits are added to your balance. You can change the number of seats or phone numbers at any time. Your invoices appear on the Invoices tab.
Troubleshooting
I don’t see Plans & Billing in Settings
Your user doesn’t have the Owner role. Ask your account owner to make the change for you, or contact GGMS support.
Add to cart is grayed out
Enter a quantity above 0 in the field first.