
Update a listing alert’s settings or search criteria, send it again, or pause or delete it, from the contact’s record.
Important
You can only work with listing alerts once your MLS is approved and connected to your CRM. If your MLS isn’t connected yet, see Is your MLS covered? or contact Support and training.
What you’ll need
- A GGMS CRM login
- A listing alert that’s already set up for the contact. To make one, see Create a listing alert.
- About 3 minutes
Find the alert
Every alert for a contact shows on the Listing alerts card on the right side of their record. The icons under each alert don’t have text labels. From left to right, they let you send, edit, change the search criteria, pause, or delete the alert.
Change the alert’s settings
- Open the contact
In the left menu, click Contacts, and then click the contact’s name to open their record. - Open the alert
On the Listing alerts card, click the pencil icon under the alert you want to change. The Edit listing alert panel opens. - Update the name or recipients
Change the Alert name if you want. Under Recipients, search for a contact to add them, or click x next to a name to remove them. - Change the schedule
Under Frequency, choose Immediately / ASAP, Daily, Every other day, Weekly, or Monthly.

Pick how often the alert emails your contact. - Choose the updates and message
Under Notify on, select every type of update the contact should get: New listings, Price changes, Status changes, or Open houses. You can also change the subject line and the personal note. - Save your changes
Click Save changes. Then send the updated alert.
Change what the alert searches for
You can’t change the search criteria in the Edit listing alert panel. Instead, you open the criteria in Listings, adjust the filters, and update the alert from there.
- Open the criteria in Search
On the contact’s Listing alerts card, click the gear icon under the alert. Listings opens with a banner that shows which alert you’re refining. - Adjust the filters
Click Filters, change the criteria, such as price, status, or bedrooms, and click the blue Show listings button. The banner shows how many listings match. - Update the alert
Click Update alert criteria in the banner. To go back to the contact’s record, click Back to and the contact’s name.

Adjust the filters, and then click Update alert criteria.
Send the updated alert
After you edit an alert, send it again so your contact gets the updated results right away. After that, it emails on the frequency and updates you chose.
- Find the alert on the contact’s record
Go back to the contact and find the alert on the Listing alerts card. - Send it now
Click the first icon, the paper airplane. Under Sent, the card shows just now.
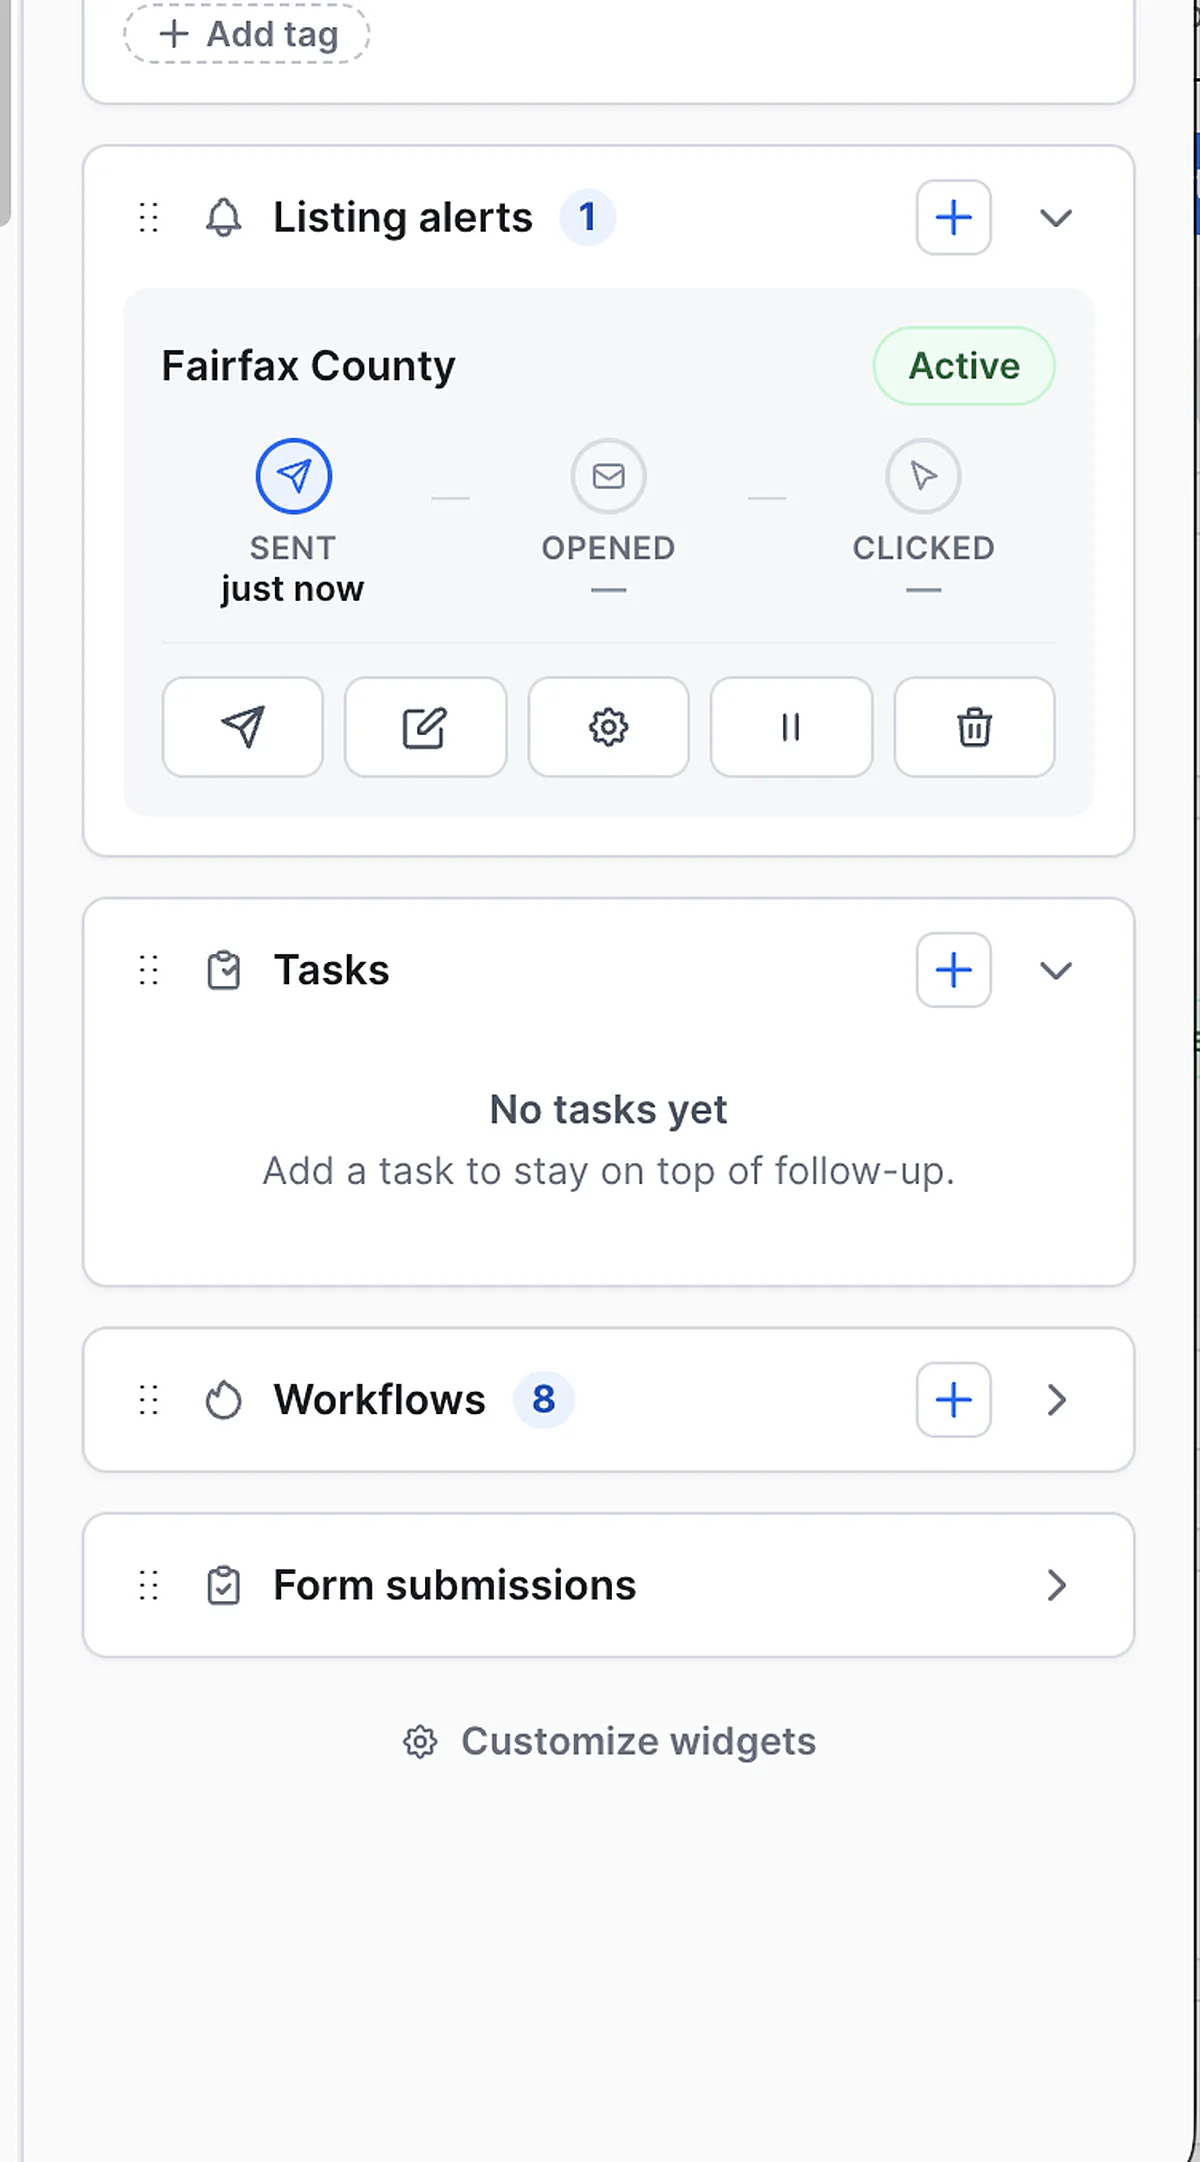
After you send the alert, Sent shows just now.
Tip
Send the alert again every time you change it. That way, your contact sees the new results without waiting for the next scheduled email.
Pause or resume an alert
- Pause: On the Listing alerts card, click the pause icon. The alert’s status changes to Paused, and it stops sending emails.
- Resume: Click the play icon, which replaces the pause icon on a paused alert. The alert starts sending again on its schedule.

Delete an alert
- Click the trash can
On the Listing alerts card, click the trash can icon under the alert. - Confirm
In the Delete this alert? message, click Delete alert. The contact stops getting the alert, but the saved search stays.
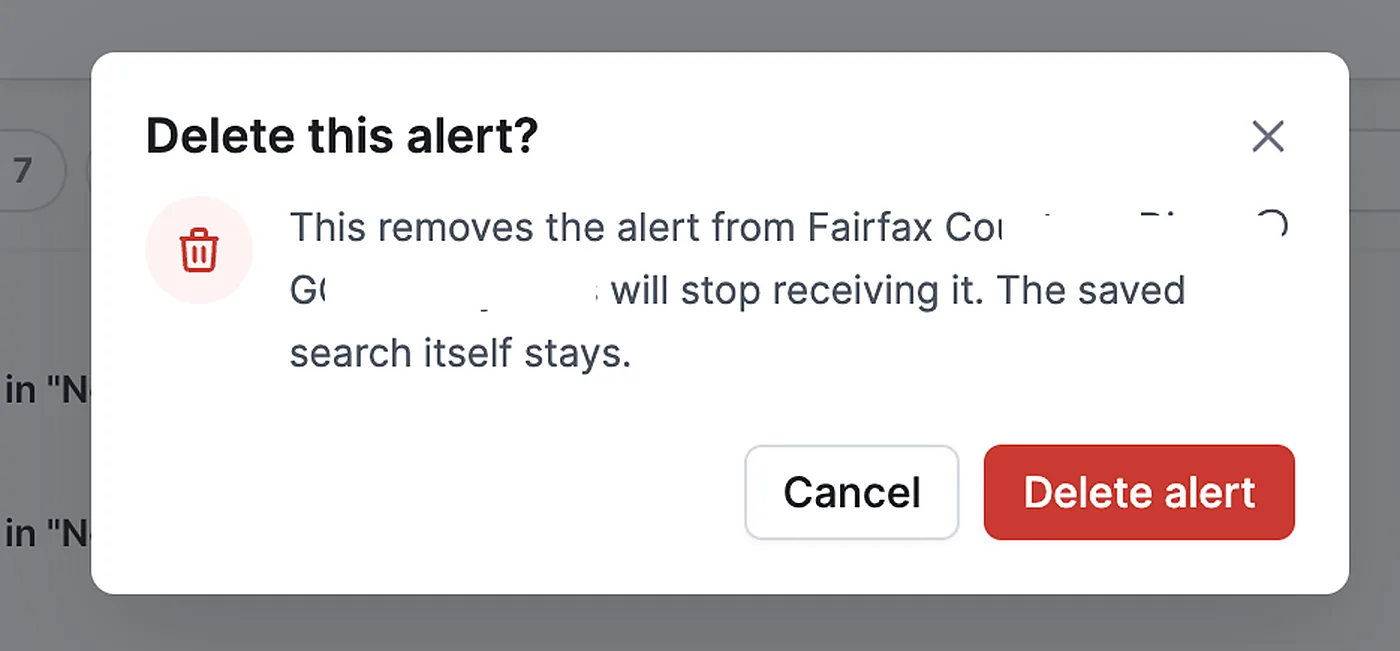
Deleting an alert keeps the saved search.
What happens next
The Listing alerts card shows when the alert was last sent and whether it was opened and clicked. You can also find all your alerts on the Listing Alerts tab in Listings.