
Build a form, send it to a contact or add it to your website, and see every response in one place.
What you’ll need
- A login to your GGMS CRM
- An idea of what you want to ask, for example name, email, and phone for an open house sign-in
- About 10 minutes
Good to know
Only published forms can be shared or added to your website. Responses are saved to the contact who filled out the form, so you can see them on their record.
Create a form
- Open Forms
In the left menu, click Forms. The All Forms page lists every form, with Published and Draft tabs. - Start a new form
Click New Form in the top-right corner. - Name your form
Click the Settings tab, then enter a Form Name and Description. Add Tags if you want to group your forms. - Add fields
Click the Create tab and drag fields, such as Short Answer, Email, or Phone Number, into the section on the left. Use the search box to find a field fast. - Set up each field
Click a field to change its Label, Placeholder, and Required setting. On an Email field, turn on Create new contact if the email is new to add new people to your CRM. - Publish the form
Click Publish when it’s ready to use. If you’re not done yet, click Save as Draft and come back later.
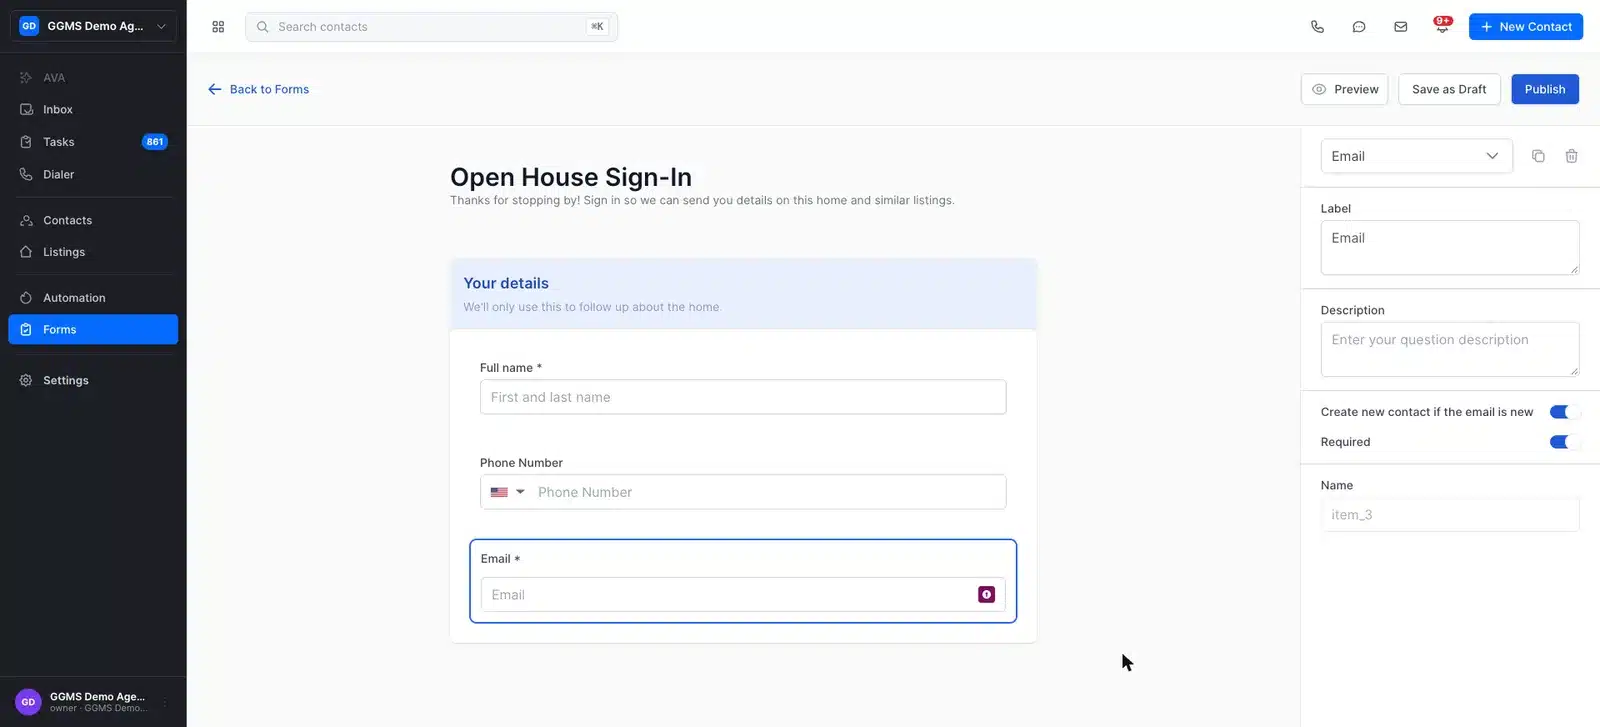
Select a field to change its label and turn on Required.
Tip
Click Preview before you publish to see the form the way your contacts will.
Share a form with a contact
- Copy the form link
On the All Forms page, find your form and click the Copy Link icon in the Actions column. You’ll see a message that the link was copied.
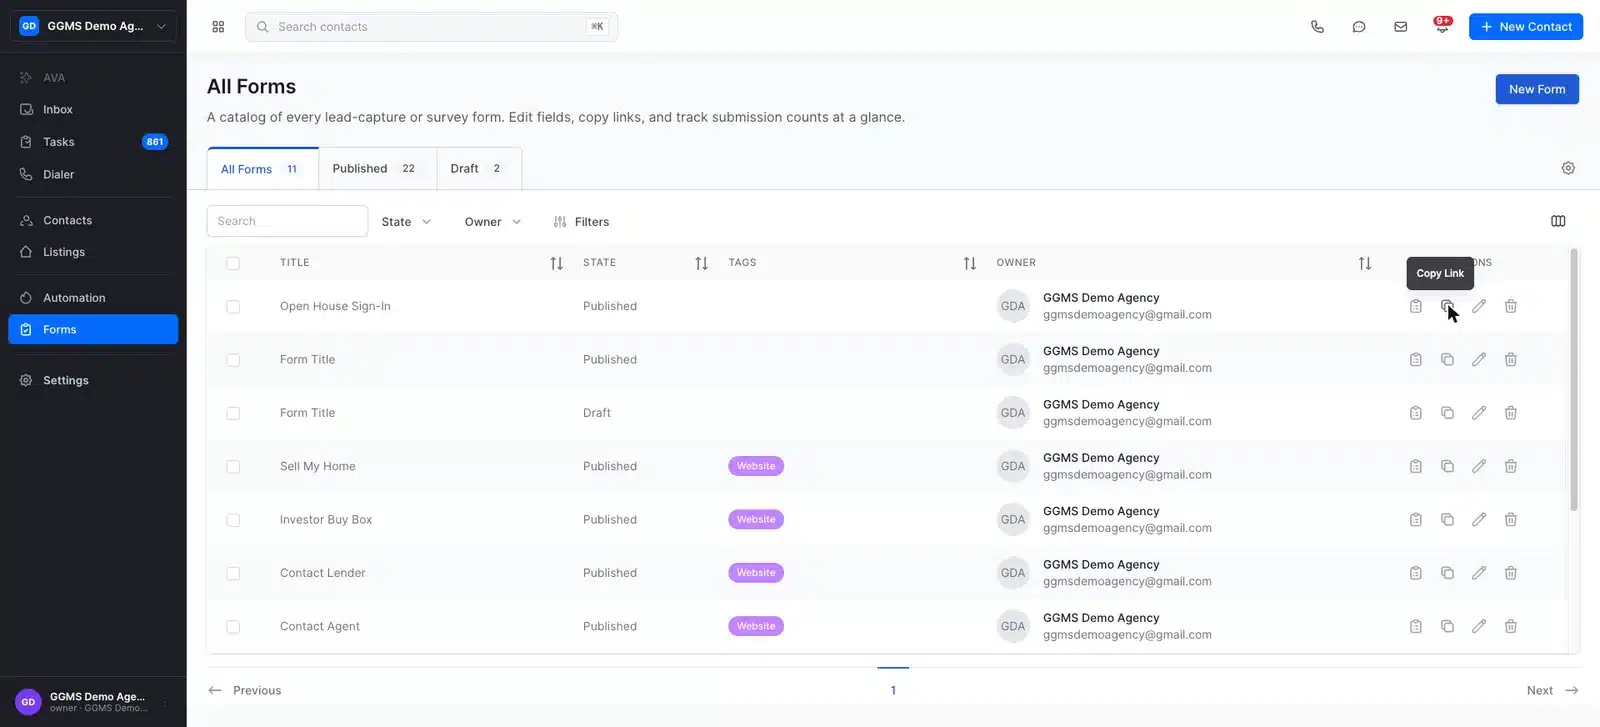
Copy Link copies the form’s public link to your clipboard. - Open the contact
Click Contacts in the left menu and open the contact you want to send the form to. - Paste the link into a message
Click the Email or Text tab, write a short note, and paste the link. - Send it
Click Send email or send your text. When the contact submits the form, their answers are saved to their record.

Paste the form link into an email or text to the contact.
View responses
- Open the responses list
On the All Forms page, click the Show Form Responses icon next to the form. Each row is one submission, with the date in the Created At column. - Open a full response
Click a row to see every answer the contact gave. - Check the contact’s record
Open the contact and look at the Form submissions widget on the right. The submission also shows in the contact’s activity.

Each row is one submission. Click a row to see the full response. 
Responses also appear on the contact’s record.
Edit a form
- Open the form
On the All Forms page, click the Edit icon next to the form. - Make your changes
Add, remove, or update fields the same way you did when you created the form. - Save your changes
Click Save. You’ll see a message that the form was updated.
Delete a form
- Find the form
On the All Forms page, click the Delete icon next to the form. - Confirm
Read the message, then click Delete. To keep the form, click Cancel.
Important
Deleting a form removes it permanently, and you can’t undo it. Responses you already received stay on each contact’s record.
Add a form to your website
You can show any published form on your website with the GGMS form widget. Visitors fill it out right on your site, and their responses come into your CRM like any other submission.
What to expect
New submissions show on the form’s responses list and on the contact’s record. If a new email address comes in and Create new contact if the email is new is on, GGMS adds that person as a new contact. Their answers, such as name and phone number, update the contact’s information.
Troubleshooting
I can’t share my form
Check the State column on the All Forms page. If it says Draft, open the form and click Publish.