
Use tasks to track every call, follow-up, and to-do in your CRM, whether you add them yourself or an automation adds them for you.
What you’ll need
- A login to your GGMS CRM
- Owner access if you want to see your team’s tasks or edit automations
- About 5 minutes
Open your tasks
- Go to Tasks
In the left menu, click Tasks. The number next to it shows how many open tasks you have. - Check your summary
The cards at the top show your Open, Overdue, Due today, and Next 7 days totals. - Narrow the list
Search by name, or use the filters, such as Reminders due, High priority, Automated, Any type, and Any priority.

Your tasks are grouped by due status, with overdue tasks at the top.
Create a task yourself
- Start a new task
On the Tasks page, click New Task. - Name the task
Type a name in Task name, or click a quick pick, such as Call to follow up or Prepare a CMA. - Choose the type and priority
Pick a Task type, such as Phone Call, Email, or To-Do, and set the Priority. - Pick a contact
If the task type reaches someone, such as Phone Call, choose the person in Associated contact. - Assign it and set a due date
Choose who it’s for in Assigned to, then set the Due date and Time. You can click Tomorrow, Next week, or another shortcut. - Add details and a reminder
Add notes in Details. Then set Remind me, Reminder channel, and Repeat if you need them. - Save the task
Click Create task.
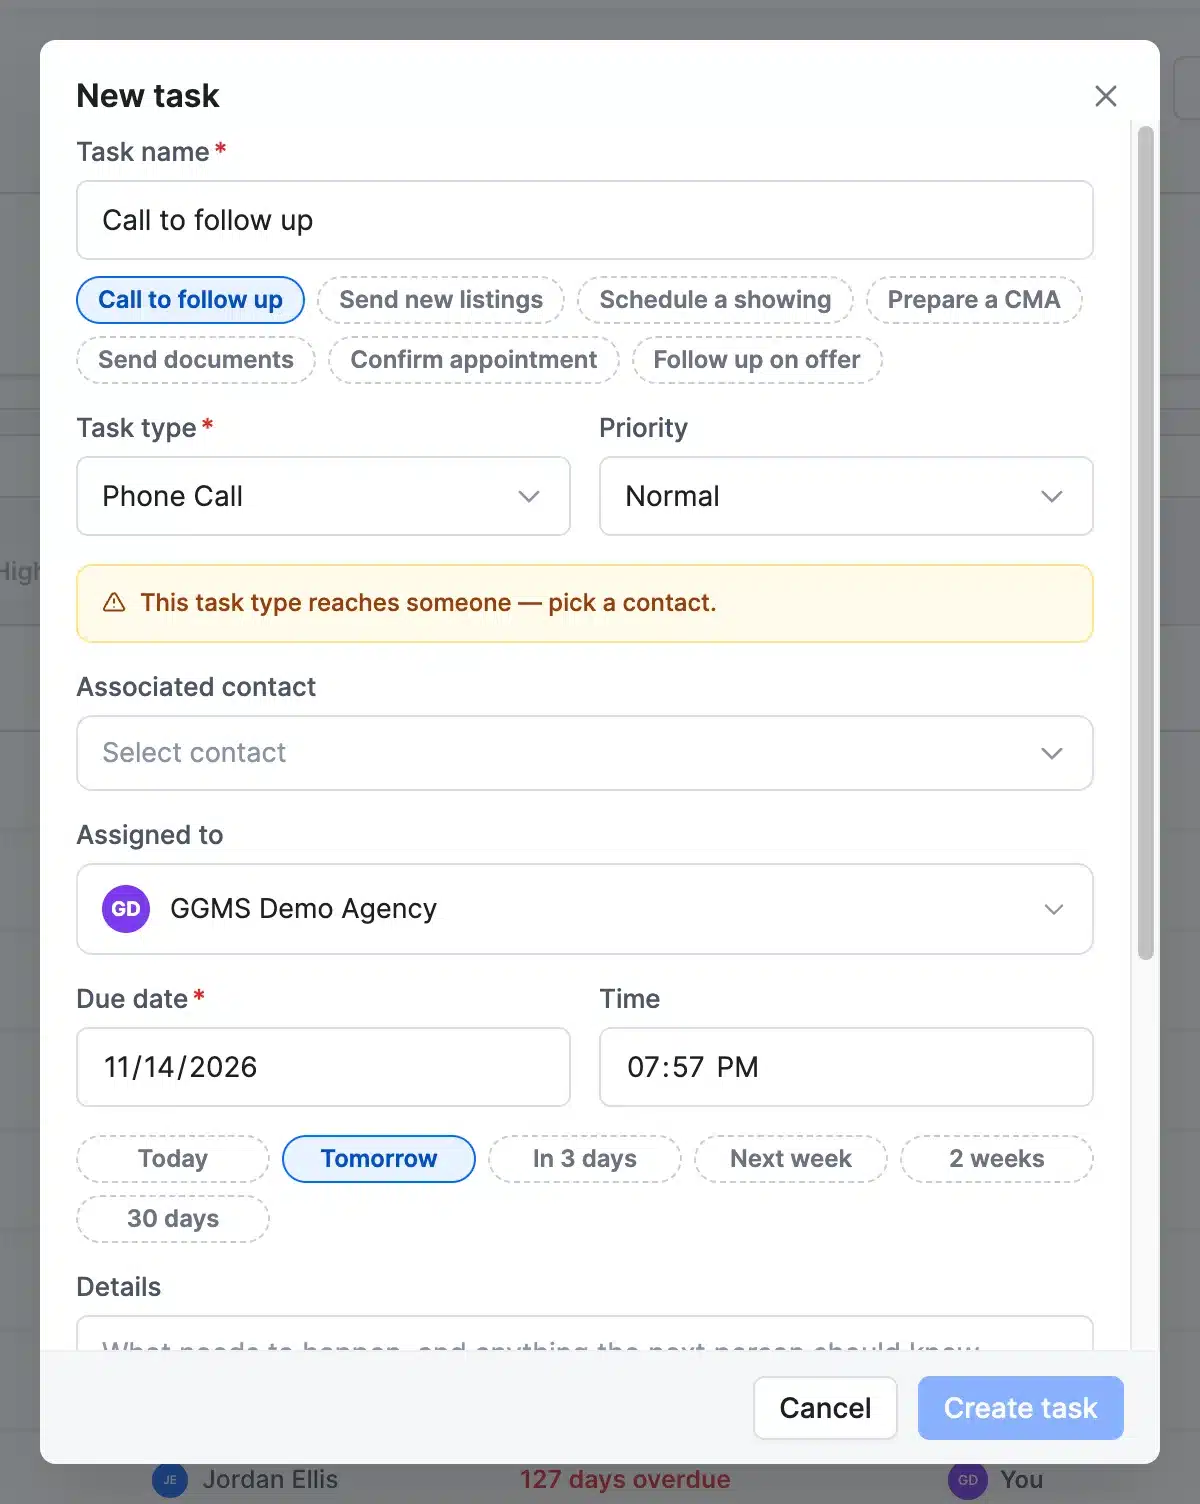
Quick picks fill in the name and type for you.
Tip
Use Mark as missed if not completed within to flag tasks that sit too long.
Create tasks with an automation
Automations can add a task when something happens, such as a contact saving a listing or submitting a form.
- Open a workflow
In the left menu, click Automation, then open a workflow or click New workflow. - Add a Create task step
In the step list, find Create task under Follow-up, and add it where you want the task to appear in the workflow. - Fill in the task
Set the Task title, Type, Priority, and Due (days later). - Choose who gets it
In Assign to, pick The contact’s owner, The workflow owner, or a specific team member. - Set a reminder and finish
Choose a Reminder, add a Description for the agent, and click Done. - Publish the workflow
Publish the workflow when you’re ready. It only creates tasks after it’s published.
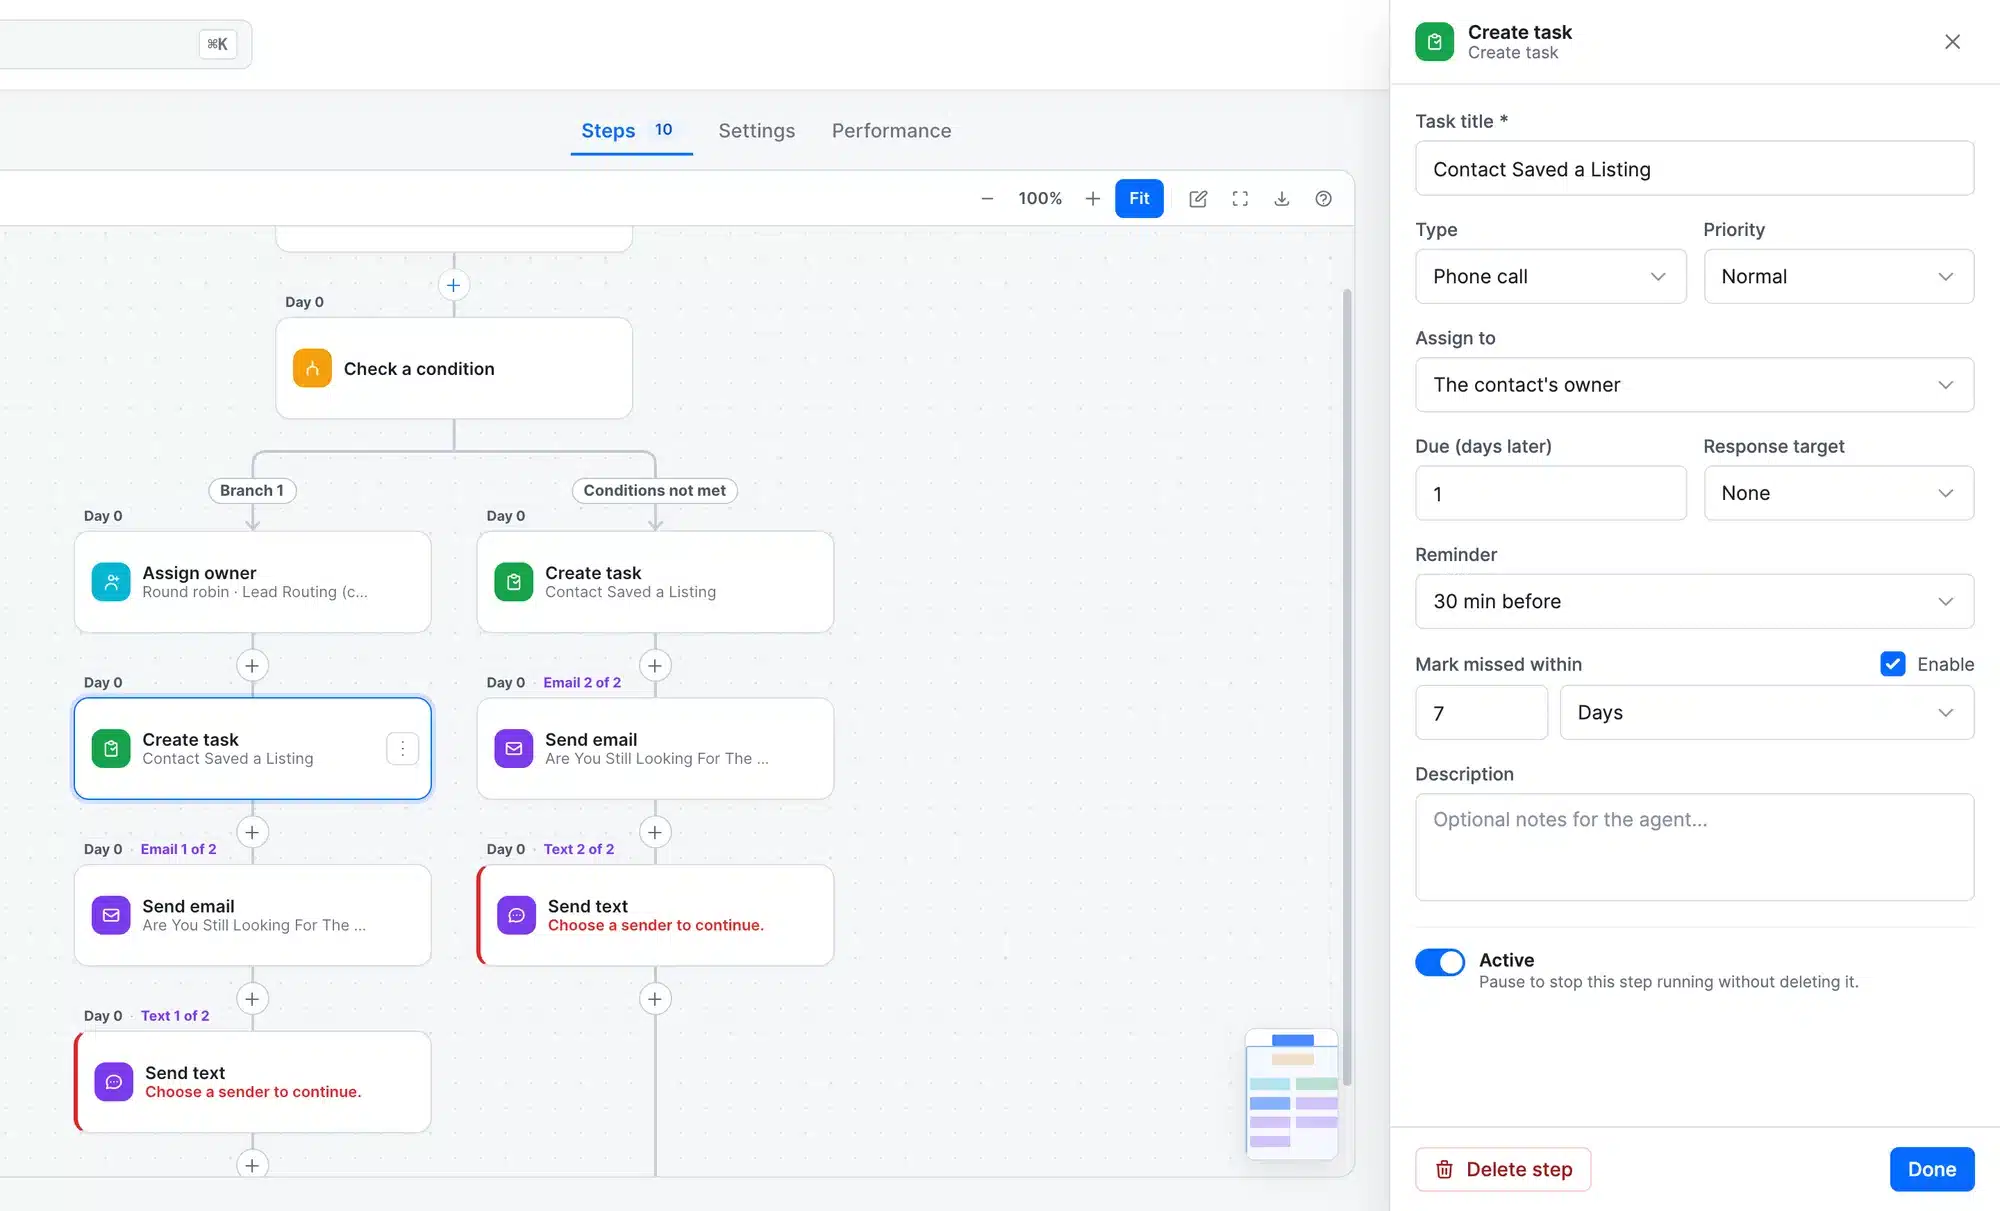
Assign automated tasks to the contact’s owner so they reach the right agent.
Good to know
To see only tasks that automations created, click the Automated filter on the Tasks page.
Who can see which tasks
What you see depends on your access level:
- Owners see every team member’s tasks. Use Mine for your own tasks, Team for your teammates’ tasks, and All for everything. In Team and All, the Anyone filter shows one person’s tasks.
- Members see only the tasks assigned to them.

What happens next
Work your list from the top. Click the circle next to a task to complete it, or click its due date to move it. To edit, duplicate, or cancel a task, click the More actions menu at the end of its row.